The kitchen should be cozy, comfortable and beautiful. The creation of a stylish interior usually requires significant financial costs. To save on wages for the designer and builders, repairs should be carried out on their own. A description of do-it-yourself kitchen repair with photos of each stage will help you cope without the involvement of professionals.
How to make a stylish renovation in the kitchen, as in the photo, with your own hands? To do this, you need to take courage, discuss with the household the features of the interior they want, present the final result of the repair and get to work.
Before starting any repair work, you should draw up a design project for the renovated kitchen area. This requires:
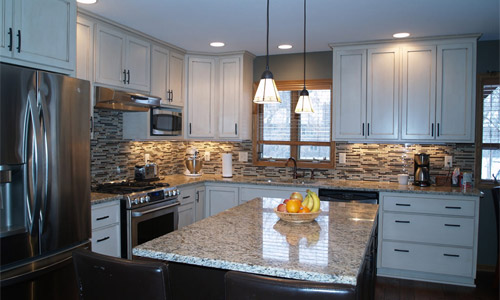
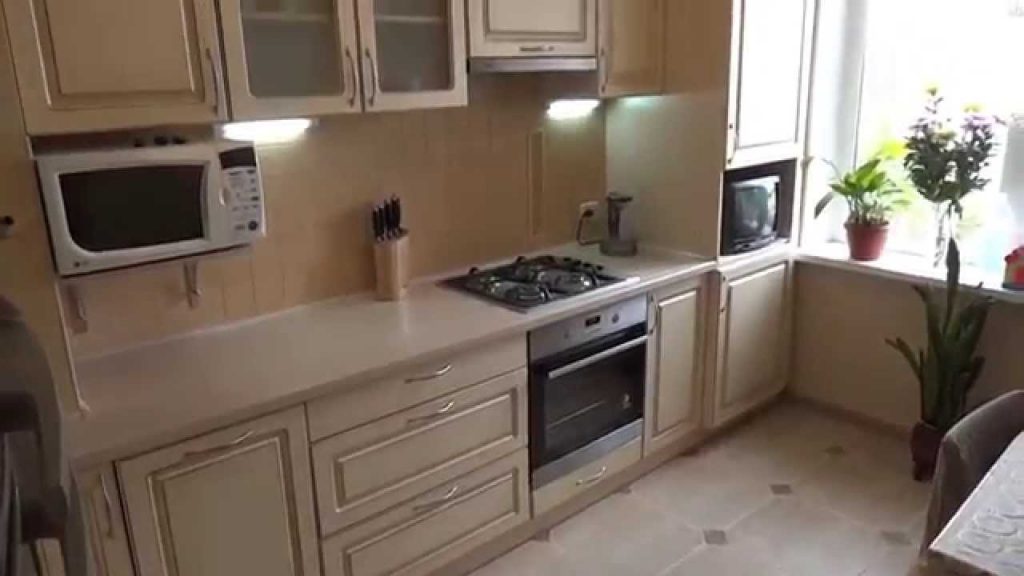
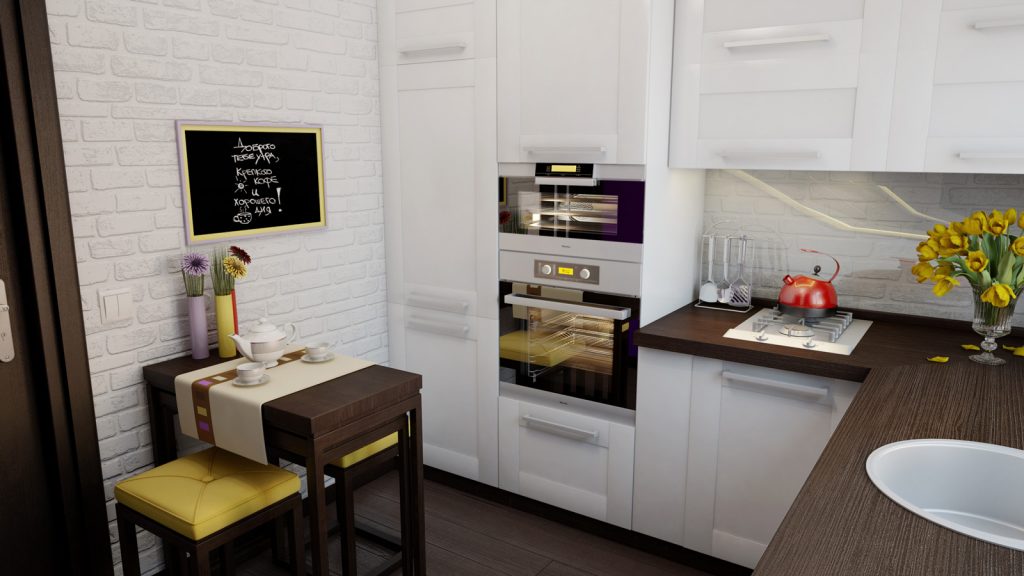
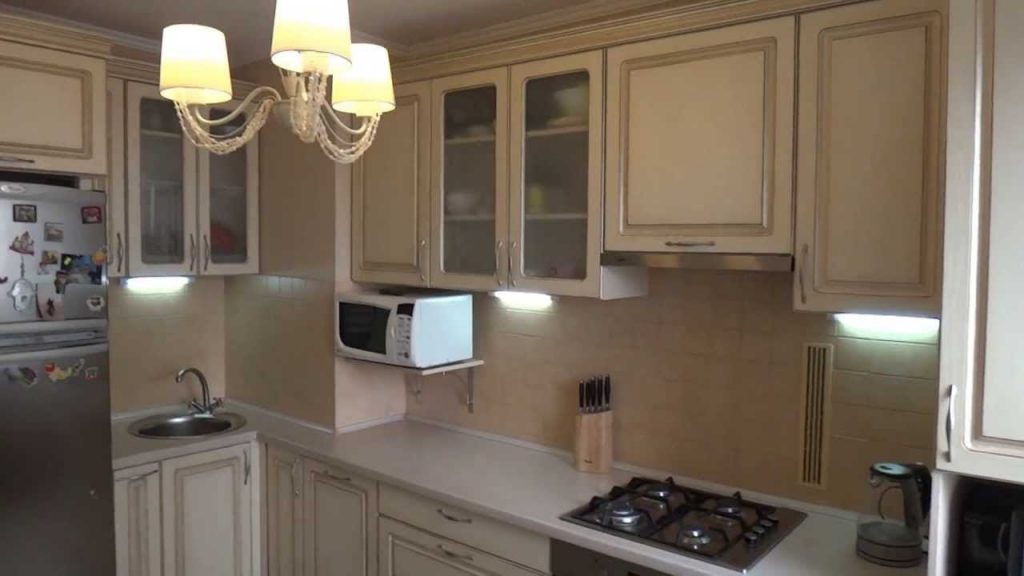
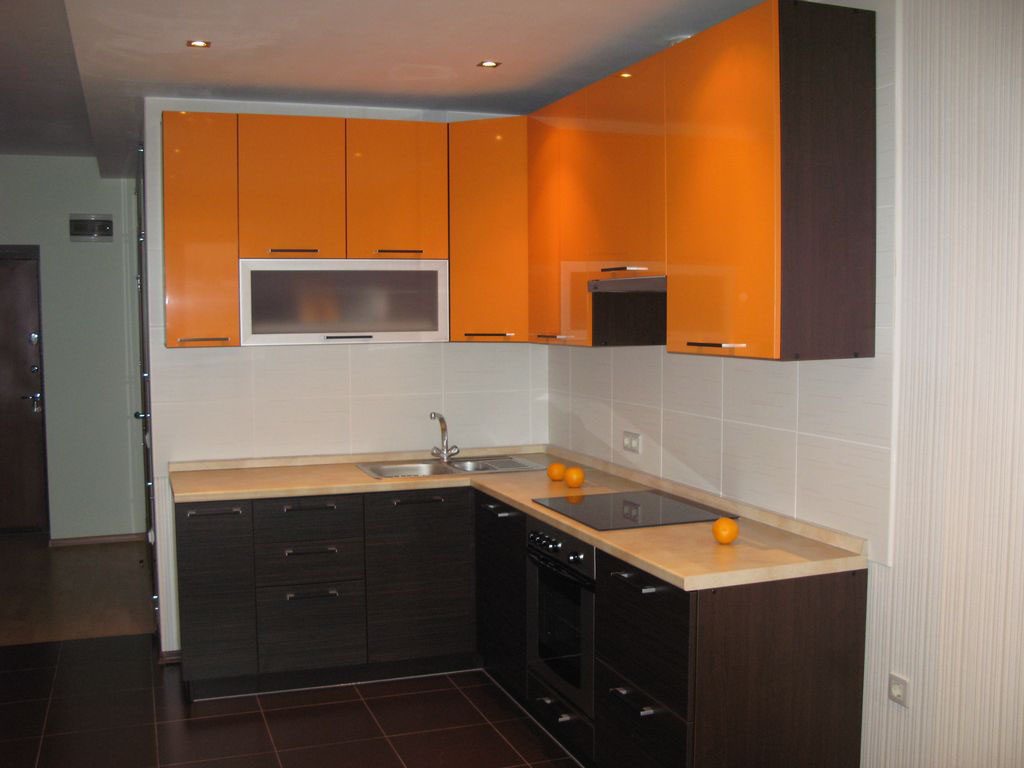
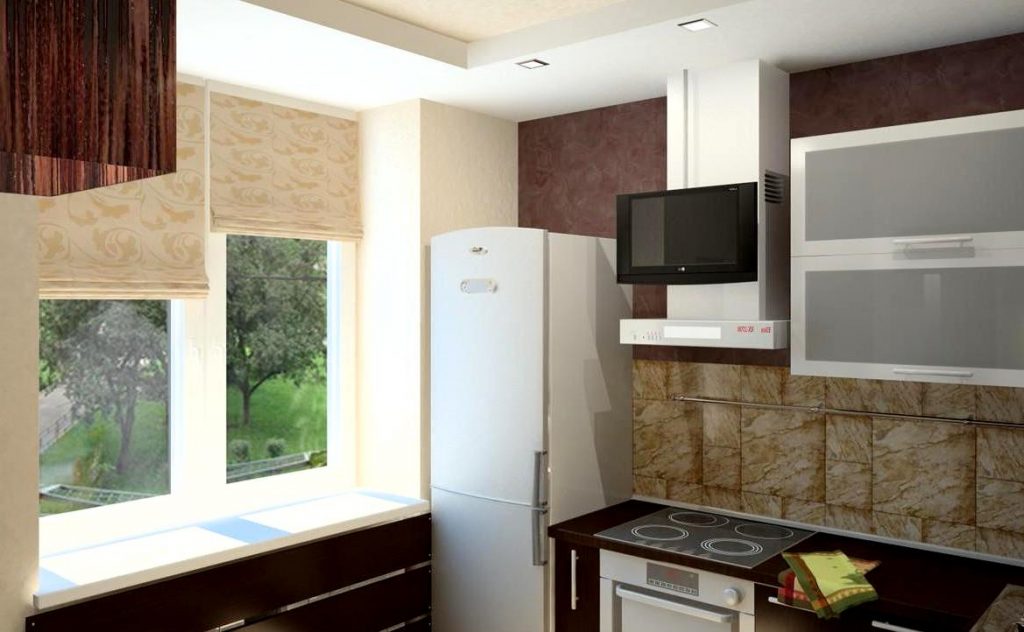
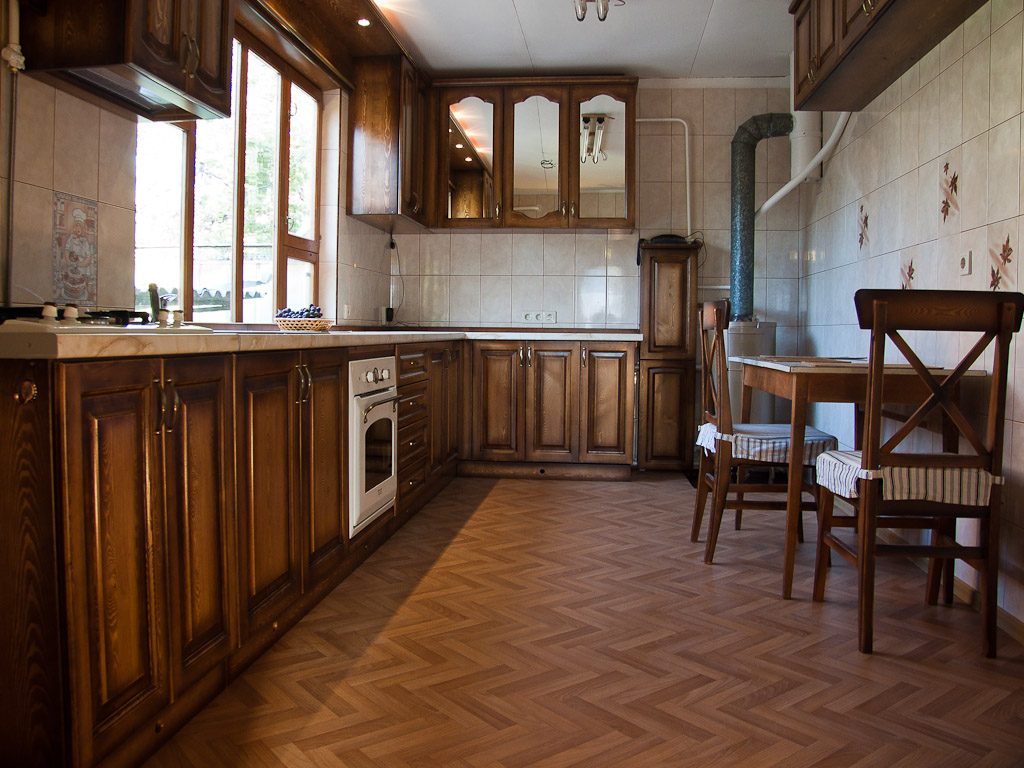
Photos of the kitchen before and after DIY repair are presented below.
For cosmetic repairs, this step can be skipped. But if the old water supply and sewerage pipes are in poor condition, then they must be replaced. One of the following materials is selected for pipes:
It is recommended that a professional electrician replace the wiring. It is important to provide for the installation of sockets at the electronics connection points.
Above the location of the stove, it is necessary to install a powerful hood, which, during cooking, will draw smoke and steam into the ventilation shaft.
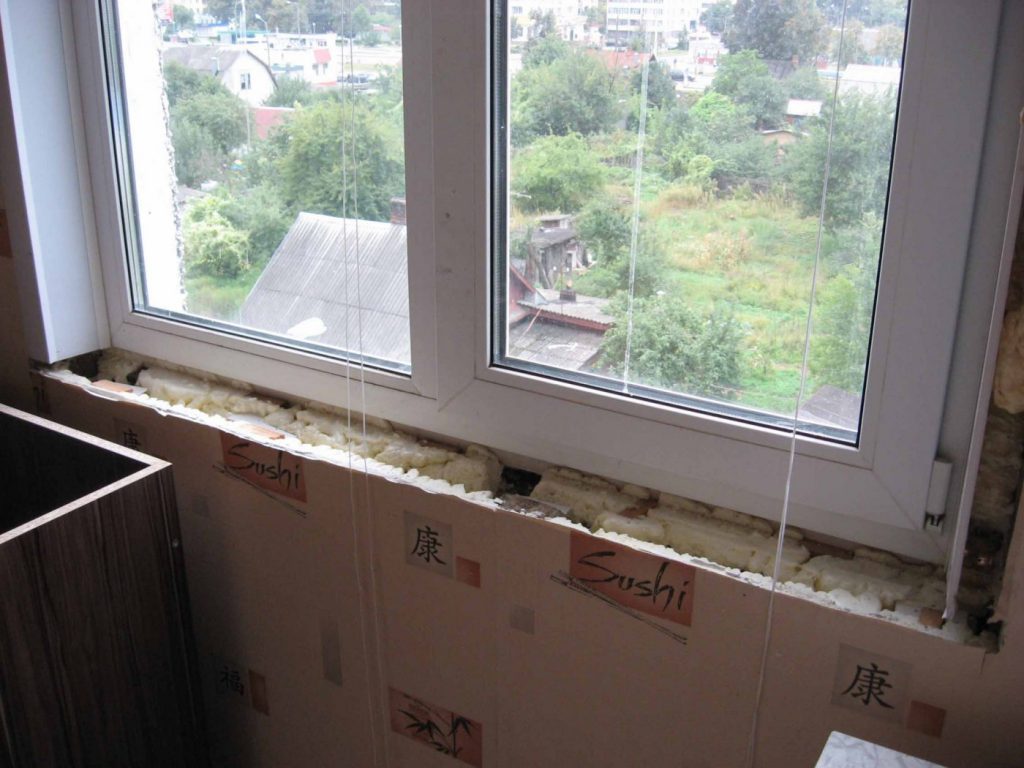
With a quick cosmetic repair and when the condition of the window frames and doors can be called satisfactory, this stage is skipped.
Wooden windows can be restored or simply cleaned of old paint from the frames and repainted.
When choosing a door, you should give preference to a plastic model. It is more practical than wood. It all depends on the style of interior decoration and the financial capabilities of the apartment owners.
When choosing materials for decoration, it is worth considering their practicality, since the kitchen is characterized by a temperature drop, as well as particles of food and drinks that may end up on the walls, floor or even the ceiling.
Before starting work on the decoration of the walls, their surface can be leveled with a putty and a primer or isogypsum. The following materials are used to decorate the walls in the kitchen:
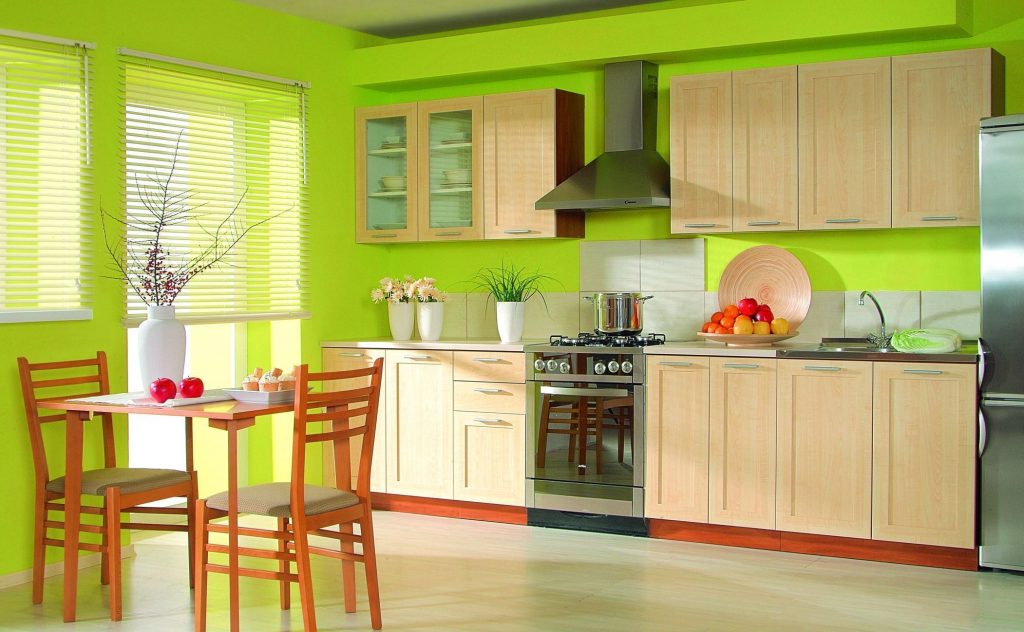
Below in the photo you can see the design of a simple kitchen renovation option.
The furniture is installed in accordance with the previously drawn drawing. Its quantity and dimensions depend on the area of the room.
A must-have piece of furniture in any kitchen is a set. It can be straight or angular, occupy one, two or three walls of the room. If the kitchen is small and will be used only for cooking, then the kitchen set and household appliances can occupy almost the entire room. In this case, the dining area will be located in another room.
If the kitchen combines both the cooking area and the dining room, then a table and chairs or a couch are installed in it. The dining area is usually placed opposite the headset.
To make the furniture fit perfectly into the space allotted for it, it is recommended to make it to order. Do not forget that the appearance of the furniture should match the style of the kitchen design.
After familiarizing yourself with the photographs of the repair work, you can safely take on the repair of the kitchen with your own hands. It is necessary to carry out the whole range of work in stages. The most important step is planning. Without a well-thought-out plan and accurately carried out calculations, it will not work to create a harmonious interior.
VIDEO
Your repost will change the internet 🙂
It was possible to start repairs, sending the whole family to their historical homeland. In order not to be so boring to be engaged in repairs, I decided to take pictures along the way.What if my experience is useful?
So, it WAS: an ordinary smoky gray room with an area of 6.5 sq. m (I forgot to take a picture, excuse me).
I wanted something cool and loft, but money was running out.
The first two days I studied the assortment of Ikea, Leroyamarlene and Obi and tried to compare my desires and possibilities. The results were not very encouraging, so first I decided to dismantle everything old.
To start repairing, you need to disassemble everything old, unscrew and drag the necessary one into the next room.
I took out 5 heavy bags of tiles from the walls to the trash heap. As luck would have it, the elevator was not working.
Tried to get close to the wiring to do it the way I need it.
Finally, we managed to clear the last wall of wallpaper. The war was fought for every centimeter: the hellish mixture of glue, which becomes terribly slippery from water, left me practically without hands.
This wealth of textures of the peeled wall, on which time has worked great, inspires me terribly. I would live alone - I would ask the designer to arrange such walls.
The ceiling has already been made, the walls and furniture remain. I decided to leave the working area above the stove as it is.
And our ceilings are crooked. The door frame is level.
Having cleared the paint from the windowsill, I saw such a stunning color that my hand did not go up to paint it back. And I will choose the color of the laminate to match the color of the window sill.
I could not find a lamp suitable in size and price in stores. Converted an old chandelier. Here is the result.
Fit new doors to the mezzanine
The most interesting thing is that the last stage of the repair was the most protracted and costly. Hanging furniture, connecting a washing machine, shelves, hooks and other little things took more time and money than the repair itself.
To be honest, the impetus for the start of the repair was the dream of such a faucet (switching modes, retractable spray) and a sink.
This is how our kitchen began to look after renovation:
The concrete was thoroughly washed and covered with wax from Ikea
I decided not to glue the wallpaper, I painted the walls with water-based paint. Covered on top with mother-of-pearl enamel from Leroy. And it is pleasant to the touch and washes perfectly.
Panorama of the kitchen after the last changes and improvements
If you have some free time and some money, and life has become too monotonous, you can make a kitchen renovation with your own hands. This will not only save money, but also acquire useful skills and even improve health, because physical activity has not harmed anyone yet.
The chances of getting a result in which you are not afraid to invite people to your kitchen after your own repair will increase significantly if you use the advice of a specialist.
When deciding how to make repairs in the kitchen, it is necessary first of all to consider the finishing materials, taking into account the costs of their acquisition and the possibility of self-installation.
So that the kitchen does not stand out much from the rest of the rooms, it is advisable to do everything in the same style.
When determining where to start renovating a kitchen, first of all, they choose a style. There are more than a dozen of them for kitchen decoration, the most famous: classic, high-tech, modern, minimalism, baroque - the implementation of many requires a lot of money.
In the classics, expensive natural materials are used - a wooden kitchen set, parquet on the floor. High-tech and modern require the presence of expensive plastic and glass materials and are more suitable for modern young people, baroque with carved furniture looks better in living rooms and bedrooms.
For established people, one of the options that are simple and affordable is to decorate the kitchen in the Provence style on their own, which allows you to create a beautiful, cozy interior, characterized by comfort and grace.
Recently, Provence has been quite popular, it assumes the presence of light pastel colors in the decoration of the room and the furniture itself (finishing under natural light wood), the presence of plants and decorative elements. Provence excludes the presence of bulky interior items (heavy curtains, massive chandeliers), the kitchen should be light and a little romantic.
Provence will add coziness and warmth to your kitchen, as it looks organic
It is not difficult to make repairs in the kitchen with your own hands with a small budget in the Provence style, it does not require a lot of construction experience and special expensive tools.
Most often in the kitchen, plasterboard ceilings are used, stretch, painted or pasted over with wallpaper. You can also use a ceiling finish made of expanded polystyrene or foam ceiling tiles or PVC panels - do-it-yourself repairs are easy, although in the latter case, you will need to arrange a wooden or metal frame to fix the PVC panels.
It is not difficult to paint the ceiling, it is enough to have a roller with a long handle
Usually, the ceilings in the kitchen are painted with waterproof paints - acrylic latex, water-based. If the ceiling is flat enough and has been painted with waterproof paint, it will not be difficult to repaint it with a roller.
This must be done at least twice, the first time the staining occurs perpendicular to the direction of light from the window, the second time - along.
In some cases, it may be necessary to level the ceiling - for this it is necessary to rinse it very well and clean it up to the floor slab, prime and apply a putty, and after it dries, wipe it with sandpaper.
Wallpaper on the ceiling looks unusual, but it is advisable to buy a waterproof version
Gluing thick waterproof wallpapers to the ceiling will eliminate the need to level it and give it a more interesting aesthetic appearance than in the case of staining.
The choice of wallpaper for the ceiling is a budget option, besides, pasting the ceiling is a fairly simple job that even housewives can handle. It is advisable to prime the ceiling before wallpapering, the stripes should be glued in the direction of the light.
Do-it-yourself Provence-style decoration requires a light wooden floor. Naturally, in a kitchen with high humidity, natural wood is expensive and impractical, it can be replaced with such common flooring materials as ceramic tiles, laminate or linoleum - all of them come with a natural light wood finish.
Ceramic tiles are durable materials with water-resistant properties, but require careful handling of heavy objects
Not the most suitable option for decorating the kitchen with your own hands; for laying tiles on the kitchen floor, you will need a special tool (tile cutter, grinder) and the skills of a qualified tiler.
In almost all kitchens, because the tile floor is rather cold, it is laid on an electric heating mat in the form of a wire about 5 mm thick. on the grid. This further complicates the task of laying tiles and requires the connection of the heater control unit with a knockout to install it, a hole in the wall and a strobe for the electric wire.
Considering that finishing a Provence style kitchen on your own will require the involvement of specialists for laying tiles, and the work will be quite expensive, this option can be abandoned.
It is advisable to choose a waterproof laminate, since the kitchen is quite humid and there is a high likelihood of frequent splashing of water on the floor.
Ordinary laminate is not a very suitable material for the kitchen due to its low water resistance, so you should use more expensive moisture resistant types with special surface treatment and locking joints. It is quite easy to repair the kitchen with your own hands, laying the laminate on a substrate, subject to a simple work technology.
Moisture-resistant types of laminate withstand exposure to water without consequences for about 6 hours, while waterproof ones are not afraid of its effects. Waterproof laminate is also made in the form of panels of various thicknesses or glued to the floor, its only drawback is the very high price.
If linoleum breaks in one place, you will have to replace it throughout the room.
A budget option for laying on the kitchen floor, modern types have the widest range of colors and patterns, commercial brands are highly durable and durable.
The disadvantages of linoleum when laying in the kitchen include its small thickness, which leads to different levels of the floor if laminate is laid in the corridor. That is why many people prefer to lay out the floor in the kitchen from impractical ceramic tiles.
This problem has a simple solution - the floor in the kitchen is filled with a leveling self-leveling mixture to the required thickness (3 - 10 mm) - this allows not only to raise the level, but also to level the floor.
You can do the filling work yourself if you have a special toothed roller and a mixer for mixing the solution (self-leveling is sold in bags as a dry mixture).
Before laying linoleum, it is necessary to make a perfectly flat floor so that there are no differences in height.
A construction mixer can be replaced with a household drill by purchasing an inexpensive whisk for mixing the solution, a roller - with a metal comb with teeth (this option is very risky to use, liquid self-leveling may not spread well on the floor and it will be damaged).
You can repair the floor by laying linoleum on KS or PVA building glue yourself, this is not too difficult construction work.
Kitchen walls should also be practical and easy to clean.
Renovation of a Provence style kitchen implies light colors; for wall decoration, MDF or PVC panels, ceramic tiles, painting, wallpapering are most often used, and the types of finishes are often combined.
Nowadays, rarely anyone decorates the entire kitchen with ceramic tiles, even to the middle of the walls, it is too expensive and out of fashion, the working area is mainly laid out with tiles.
There are 2 types of MDF, fiberboard or PVC panels: from a solid sheet (average size 1.2 m by 3 m) or type-setting, which are mounted on a wooden or metal frame.
In the latter case, the use of type-setting panels is impractical, since this significantly reduces the free space of the kitchen by the thickness of the frame and panel. In kitchens, it is better to use MDF panels covered with moisture-resistant PVC film or one of the types of fiberboard - laminated hardboard. The sheet panels are about 3 mm thick and are attached to the walls with glue.
Choose only waterproof paint that will not lose its appearance after washing
For painting the walls, preparation is necessary by leveling with puttying and rubbing, otherwise the light falling from the windows will highlight all the irregularities. The work is quite difficult for a layman and will require additional financial costs, and a monochromatic painting of the walls looks rather boring and is unlikely to become an interior decoration.
It is common knowledge that waterproof acrylic paints can be washed, but this statement is not entirely true. In the area of the working area, drops of food with fat often fall on the wall, which are absorbed into the porous surface of the paint and is practically not washed off.
3D wallpaper has an unusual texture that will help to hide irregularities
The most budgetary option is wallpapering the walls; the most practical way is to do it with paintable or vinyl glass wallpaper. The latter, due to their thickness, will hide irregularities on the walls, and all types of dirt, including grease, are perfectly removed from their smooth water-repellent surface.
For finishing the working area of the kitchen, you can use the same moisture-resistant materials as for finishing the walls. It is not difficult to install PVC panels or laminated MDF and fiberboard on the wall by gluing.
When decorating a work area, it is very important to apply the coating to a flat wall. In this case, the top of the countertop will fit snugly against the wall, and the thin panels will adhere well in all places.
The currently popular tempered glass panels with a bright pattern are not quite suitable for the Provence style, the use of frosted glass will fit more.
This is a rather expensive option, and although the glass can be installed independently, it makes no sense to save on this if the cost of the material itself is much more than the installation work that takes little time (1 - 2 hours).
Glass panels look sophisticated and suitable for expensive kitchen options
Laying tiles on flat walls is easy to do with your own hands if you have the simplest tool (hydraulic level, glass cutter), the only difficulty arises when cutting out holes for sockets - you need a grinder.
Conventional wall tiles, unlike floor tiles, have a rather soft base. Therefore, it is not difficult to cut it in a straight line using a conventional glass cutter, drawing a line on the glaze and breaking it along the notch line against a hard corner.
In order to avoid misunderstandings, it is advisable to make repairs in the kitchen according to a design project - this will allow you to select and purchase materials suitable for the interior in advance, avoiding their shortage. The sequence of repairs in the kitchen is as follows:
Freeing the room from the kitchen set and all accessories (removing the chandelier, baguette).
Dismantling of old ceiling, wall and floor coverings.
Garbage removal.
Plaster or putty, followed by cleaning the ceiling and walls.
Work on leveling the floor in the kitchen (screed, self-leveling).
Changing the walls and floor in the apartment, followed by the wiring and installation of boxes for sockets and switches, the output of lighting wires. Sometimes you may need grooves for plumbing pipes, followed by the output of plumbing fittings pipes to the walls.
Ceiling decoration.
Non-experts recommend doing kitchen repairs with your own hands from top to bottom: ceiling, walls, floor, which in practice is not entirely true. For example, painted walls and ceilings at the beginning of renovation work when installing screeds, self-leveling in the kitchen, laying tiles on the floor can be heavily soiled, so it is correct to do the most dirty work first (plastering walls, screed, laying tiles on the floor and walls).
Wall decoration.
Laying the floor covering.
If the flooring is linoleum or laminate, the installation of which does without dirt and dust, and the material itself is poorly wiped off the paint, paint work should be carried out first. In the case of wallpapering, it is more practical to put the floor at the beginning, and then proceed to decorate the ceiling and walls.
Making repairs in the kitchen with your own hands using the cheapest materials (wallpaper, linoleum) in the Provence style is not very difficult if the work is carried out in stages. The working area can be independently decorated with laminated MDF, PVC, fiberboard or tiles, in many cases it is supplied with a custom-made kitchen set.
VIDEO
Sooner or later, but the moment comes when the owners of the apartment begin to think closely about major repairs, alterations, modernization of their kitchen. Someone just got tired of old dilapidated walls, ceiling, worn out furniture. Someone is not satisfied with too little, in his opinion, the functionality of the room. Someone wants to optimize tight spaces to the maximum. In any case, the renovation of a good kitchen results in a fairly large-scale and expensive event.
DIY kitchen repair
In addition to the fact that you will have to purchase a lot of good quality building materials, select new furniture and kitchen appliances, carry out or update communications, a very significant part of the costs should be planned for the remuneration of specialists. Is it possible to save money on this by making repairs to the kitchen with your own hands?
To make such a bold decision, you need to be very clear about the amount of work that you have to face.The purpose of this article is to give the reader an idea about the specifics of repairs in the kitchen, about the nuances of arranging this room, so that you can really assess your strengths and capabilities before starting work.
The kitchen almost always has a special "status" in comparison with other areas of the apartment, and special requirements are imposed on its equipment and decoration.
Housewives spend a very significant part of their lives in the kitchen. This means that it is necessary to create the most comfortable conditions for this. It should be warm, good lighting required, and drafts should be prevented.
Food preparation should be carried out as clean as possible. This means that it is necessary to make the premises meet the accepted sanitary standards. The kitchen is cleaned almost after every use and should therefore not be overly difficult.
Cleaning your kitchen regularly shouldn't be a problem.
All the necessary communications must be laid in the kitchen - plumbing, with cold and hot water, sewerage, gas main (if the house is gasified), electrical wiring of the required power.
The products used for cooking often leave oily, greasy traces, and can be quite chemically aggressive. At the same time, the danger lies not only in the direct hit of such substances on the floor surface and walls adjacent to the working areas - one cannot but take into account the abundant fumes that are inevitable during thermal cooking. This means that even the ceiling is not completely insured from such an impact. Materials for finishing all surfaces of the room and kitchen furniture must be selected so that they are not afraid of such influences and can be easily washed.
All surfaces in the kitchen should be easily washed from grease.
At the same time, the kitchen is a room with high humidity - this must also be taken into account when choosing finishing materials. Whatever one may say, no one in the kitchen can be insured against liquid spills on the floor - hence the increased requirements for waterproofing.
To minimize the negative effects of vapors and maintain a comfortable atmosphere in the kitchen, it is necessary to do without an exhaust ventilation system and / or autonomous air purification.
An essential element of the kitchen is effective ventilation.
The modern kitchen is full of technology, without which many housewives can no longer imagine their life. A thoughtful placement of devices and their correct connection is required, taking into account the safety rules of operation.
The very room of the kitchen and the placement of all the necessary elements in it should be thought out to the smallest detail - it should be as convenient for the owners to use it for its intended purpose as possible.
Another important point is that in the vast majority of families, the kitchen is by no means just a cooking room. Usually this is a kind of "family club" where a lot of topical internal issues are resolved and where "get-togethers" are held with the closest relatives and friends. And this means that, if possible, a cozy corner should be provided where you can comfortably sit. Yes, and the entire decoration of the kitchen should be such that it is pleasing to the eye, and so that it would not be ashamed to receive guests there.
In the end, the kitchen should be just beautiful and cozy.
And all this, as mentioned above, needs to be organized, most often, in conditions of a very limited area of \ u200b \ u200bthe premises, where you will not particularly "run away". So the task is very difficult.
Actually, the kitchen renovation itself can be divided into many stages, each of which is important in its own way, but more often it is mandatory, with one or another variation. It is enough just to list these stages to make it clear how ambitious the overall task is. So, "on the way to the finish line" is the following:
Freeing the premises - usually it is required to be carried out in full, otherwise it is difficult to carry out measurements and planning.
Checking the condition of walls, ceilings, floors, windows and doors, communications, etc.
Carrying out careful measurements.
Planning the placement of large-sized stationary kitchen and household appliances.
Preliminary selection of kitchen furniture - both in size and functionality. Drawing up a project for its placement.
Thorough cleaning of all surfaces of the room.
Repair (renewal) of the base floor surface.
A similar operation - revision of the condition and basic repair of the ceiling.
Repair of communications or laying new ones, corresponding to the drawn up project.
Checking the status of ventilation, possibly making changes to its design.
Replacement or thorough restoration of windows and doors.
Finishing work, from top to bottom: ceiling, walls and finishing flooring with the installation of skirting boards.
Installation and suspension of stationary equipment, furniture, lighting fixtures.
Connecting and checking the performance of all systems.
Now it makes sense to consider these stages in more detail. However, not everything will receive the same great attention: some of them are simple and intuitive, do not require special explanations, others are related to technological processes, which are described in great detail and intelligibly in special publications of our portal (the corresponding links will be offered to the reader). But certain specific points require a really close look.
It is impossible to plan the repair correctly without conducting a thorough audit of the condition of the room - walls, floor, ceiling, communications. And it will be possible to carry out such a deep check only after the kitchen is completely freed from furniture and equipment, since in most cases it will be necessary to remove the old floor covering. Ideally, renovations are best done when the family is temporarily living elsewhere. If this is not possible, you will have to somehow get out of the situation - temporarily leave the old stove in place, there is water in the bathroom, and even a small work table can be moved wherever you need it.
After the kitchen is emptied, a completely unattractive picture often opens.
After that, you can quickly assess the state of the room - is there any point in leaving something in its original state, or is it still required a more radical approach. It is necessary to tap all walls to identify weak, unstable spots. It has already been mentioned about flooring - in 99 cases out of 100, dismantling will be required. The condition of windows and doors is assessed - is it worth repairing and restoring them or is it easier to install new ones. The same applies to the heating radiator - perhaps the old battery will not fit into the conceived concept of the kitchen interior.
Most often, the flooring needs to be replaced.
It is necessary to assess the condition of water mains and sewerage systems - whether they need replacement, transfer to another place, complete alteration in connection with the planned installation, for example, a column or a boiler.
The location of the outlets and their condition should be assessed. True, if repairs are carried out with the installation of new kitchen equipment, then, most likely, the wiring of the power supply will have to be redone for a corresponding increasing load.
After the room has been vacated, it will not be difficult to carry out thorough measurements of all the parameters of the kitchen - to the smallest detail. This is a prerequisite for further planning.
It is necessary to draw at least an approximate plan of the kitchen on a sheet of paper so that you can transfer the results to it directly during the measurements. Subsequently, the plan can (and even should) be "cultivated".
What parameters are subject to mandatory measurements:
The length and width of the room. The distance between the opposite walls is measured, preferably not only along the wall perpendicular to them, but at several points.Do not be too lazy to measure the diagonals to compare them - this will help you to find out exactly whether the correct rectangle lies at the base. If the room has a complicated shape - with a niche or part of a corridor, this is also transferred to the plan with all dimensions
Height from floor to stream.
The location of windows and doors - their distance from the walls, length and width, the direction of opening the sashes, for a window - the height of the window sill.
The location of the heater (battery) with reference to the wall on which it is located, the passage of the heating riser and the pipes to which the radiator is connected.
The specific position of the gas riser, the meter (if any) and the mounted branch pipe with a tap for connecting a gas stove.
The location of the input of water pipes and sewerage. If a transfer is planned, then it will be possible to mark their desired position on the diagram.
The size and position of the vent.
The exact location of power outlets, general lighting switch in the kitchen.
If there are other stationary elements in the kitchen (for example, mezzanines on the door, etc.), then they are also applied to the diagram.
For convenience, the reader is offered an approximate graphical diagram of the required measurements:
Measurement scheme. Decoding - in the table below
My home is my fortress, but how can I find the strength to repair my fortress? Only the thought of repairing a chill begins to creep through the body. How to make an inexpensive kitchen renovation without much effort, quickly and with your own hands, even for a beginner?
If you are limited in finances, then do the simplest, refreshing and inexpensive DIY repairs:
Step 1 for an inexpensive renovation in the kitchen: whitewash the ceiling with diluted plaster, follow the instructions on the package
Step 2 for a quick kitchen renovation: Apply new wallpaper, even if it is not expensive, but clean new wallpaper will fill your kitchen with freshness. Apply the adhesive to both the wall and wallpaper for strong adhesion. The glue can be taken with a color indicator to smear every section of walls and wallpaper and not miss a single centimeter.
Step 3 for a quick and inexpensive repair: Add a bright accent to the kitchen apron: if you have a tile, then of course it is better not to touch it, let it stay in place, decorate it with stencil drawings with acrylic paint or spray. Stencils can be taken from the Internet: print on a printer, stick on cardboard and cut out with a paper knife.
Buy paint, spray, masking tape and more: attach the stencil with masking tape to the tile and apply paint. If you have ordinary paint, then it is better to apply with a sponge, but there is a little trick: so that your hands do not get dirty from the sponge, attach a regular clothespin instead of a pen to a piece of sponge, and then use light patting movements to hammer the paint onto the stencil. Let the paint dry before carefully peel off the masking tape and remove the stencil.
Step 4 for inexpensive kitchen renovations: Paint radiator, gas pipe. By the way, you can choose not white, but a different color for painting them - look at your wallpaper and choose a color from their drawing, so you will not violate the color scheme of the kitchen design.
Step 5 for a creative cheap kitchen renovation: If you don't have tiles on your kitchen backsplash. but just a painted wall, then choose a bright extraordinary color for painting the apron. Use the color clue of your wallpaper - choose the desired shade for the kitchen apron from their drawing.
To paint an apron in the kitchen, we recommend using ready-made colored paint; using a color scheme requires experience and skill in mixing.
Step 6 for a quick renovation in the kitchen: paint the door to refresh, change the door handles, remember that the designer's art is hidden in the little things.
Change your kitchen floor carpet if new linoleum or laminate flooring is not available.
Read Kitchen apron size standard
If possible, change the upholstery of furniture in the kitchen or change the flooring to chairs and stools, buy new bright potholders or towels, lay a new tablecloth, try rearranging the furniture.
Remember that with a new renovation, innovations and changes always come to life. Enjoy the processes of creating your home. Take your time, immediately at the beginning of the repair in the kitchen, set an acceptable time frame for yourself so that work per day will take you a little time, 1-3 hours depending on your daily workload. Do not accumulate repair fatigue, rest and recuperate.
It has been noticed that if the repair is carried out gradually, and the participants in the repair enjoy it, then in their lives there are changes only for the better. So never be afraid to do it yourself, but approach it with respect without unnecessary fuss and nervousness.
VIDEO
The kitchen is the place where people spend a lot of time. Here they not only cook and eat food, they talk here, solve family issues and just live with a cup of tea. That is why this room should always be clean, comfortable and functional. However, not everyone can afford expensive repairs by a famous designer. In the case of a limited budget, there is a way out - to do a redecoration of the kitchen with your own hands. from the beginning to the end.
There are a number of building materials that will be acceptable in the kitchen interior as good in terms of price-quality ratio. And it does not hit the budget, and will not become unusable in a couple of months.
plastic panels,
plasterboard in one tier,
paint,
wallpaper,
putty.
The walls will have to be delimited by zones. The work surface will be lined with ceramic tiles (the most inexpensive of the easily washable and not afraid of high temperatures), and everything else will be finished with washable wallpaper, putty or paint.
Photos are enlarged, click!
Do-it-yourself economical kitchen repairs should be planned in advance and fully calculated: from the style in which the interior changes will be made to the timing of all the work.
To date, do-it-yourself budget redecoration of the kitchen will cost you an average of 26,000 rubles. (based on the area of the room - 9 sq. m.), where 5000 rubles will be spent on the floor. (if the main coating does not cost more than 400 rubles per 1 sq. m.), on the walls - 17,000 rubles. on the ceiling - 4000 r.
We buy all the building materials and tools necessary for work. The latter, in order to save money, we try to borrow from friends and relatives, in extreme cases we turn to rent an instrument.
Read Kitchen renovation where to start in stages
We carry out do-it-yourself kitchen repairs only after freeing up space for work.
Directly the repair itself, in which
remove all old wall coverings (paint, wallpaper, etc.);
we prime the walls and level them with putty;
we carry out all conceived painting works;
we lay the kitchen apron, having previously drawn its contours directly on the wall;
we carry out the ceiling decoration;
gluing wallpaper in the rest of the kitchen;
we lay new linoleum or laminate on the floor.
We carry out a final general cleaning, placing all pieces of furniture and equipment in their places. We add small touches to maintain style and comfort in the room (photographs, paintings, accessories, etc.).
What is not worth saving on?
When repairing a kitchen inexpensively with your own hands, it is important to remember that this room is still a high-load area - and therefore there are materials that cannot be saved on:
on ceramic tiles in the area of the working apron (cheap wallpaper or paint simply will not withstand the temperatures, and in what cleanliness condition they will be literally a week after the kitchen is used - needless to say);
on a primer and putty (applying a new finishing material to uneven walls or an old coating not only leads to the fact that new materials look disgusting, and do not last long, and are used below their usual period, but also increases the consumption of paint on the surface);
on washable wallpaper (when buying ordinary paper walls, they will quickly become unusable, since it will be very problematic to wash them).
How can you save money in kitchen renovation?
On finishing materials, choosing monochromatic options.
If there is no pattern on wallpaper and ceramic tiles, you will need less of them.
At the manufacturers of building materials.
Do-it-yourself kitchen renovation will be cheap if you buy a number of goods from not well-known foreign brands, but from domestic manufacturers: they often do not differ too much in quality, but are much more affordable in price.
Many works can be done independently, armed with the necessary tools.
The choice of interior style for the future kitchen will greatly affect how much money will be spent on the design of such a room. Cheap kitchen renovation with your own hands is simply impossible for baroque, avant-garde or expressionism.
But it is perfect for
simple Minimalism with its minimum of functional and unusual items, light shades and a lot of free space;
delicate Provence with small patterns and wood with an abundance of decorative elements;
strict Country with a predominance of wood and a minimum of frills;
an unconventional Loft with its brickwork and elements of ease and independence.
Read the ceiling in the kitchen finishing options
But the final choice is yours!
We advise you to watch an interesting video on how to repair a small kitchen yourself!
VIDEO
It was possible to start repairs, sending the whole family to their historical homeland. In order not to be so boring to be engaged in repairs, I decided to take pictures along the way. What if my experience is useful?
So, it WAS: an ordinary smoky gray room with an area of 6.5 sq. m (I forgot to take a picture, excuse me).
I wanted something cool and loft, but money was running out.
The first two days I studied the assortment of Ikea, Leroyamarlene and Obi and tried to compare my desires and possibilities. The results were not very encouraging, so first I decided to dismantle everything old.
To start repairs, you need to disassemble everything old. unscrew and drag the one you want to the next room.
I took out 5 heavy bags of tiles from the walls to the trash heap. As luck would have it, the elevator was not working.
Tried to get close to the wiring to do it the way I need it.
Finally, we managed to clear the last wall of wallpaper. The war was fought for every centimeter: the hellish mixture of glue, which becomes terribly slippery from water, left me practically without hands.
This wealth of textures of the peeled wall, on which time has worked great, inspires me terribly. I would live alone - I would ask the designer to arrange such walls.
He began to gouge holes for 4 sockets - all the neighbors came running. As I remember, I will shudder.
The ceiling has already been made, the walls and furniture remain. I decided to leave the working area above the stove as it is.
And our ceilings are crooked. The door frame is level.
Having cleared the paint from the windowsill, I saw such a stunning color that my hand did not go up to paint it back. And I will choose the color of the laminate to match the color of the window sill.
I could not find a lamp suitable in size and price in stores. Converted an old chandelier. Here is the result.
Fit new doors to the mezzanine
The most interesting thing is that the last stage of the repair was the most protracted and costly. Hanging furniture, connecting a washing machine, shelves, hooks and other little things took more time and money than the repair itself.
To be honest, the impetus for the start of the repair was the dream of such a faucet (switching modes, retractable spray) and a sink.
This is how our kitchen began to look after renovation:
The concrete was thoroughly washed and covered with wax from Ikea
I decided not to glue the wallpaper, I painted the walls with water-based paint. Covered on top with mother-of-pearl enamel from Leroy. And it is pleasant to the touch and washes perfectly.
Video (click to play).
Panorama of the kitchen after the last changes and improvements

