In detail: vaz 2112 do-it-yourself engine overhaul from a real master for the site my.housecope.com.
One of our old customers changed the car for a VAZ 21124 (1.6 liter engine, 16 valve). The car is not new, the mileage on the odometer is 85 thousand km. After some time, problems appeared - immediately large quantities of antifreeze left the cooling system, the expansion tank was inflated, the client had to constantly top up the antifreeze. After a trip to the intercity, the car was brought in for repairs - the oil pressure lamp blinks, hydraulic lifters knock. After inspecting the car, a verdict was delivered - the mileage was twisted, but the car was in good condition. Compression measurement showed a difference in cylinders up to 2 atmospheres. We will disassemble the engine, look for and eliminate the causes of the problems.
We remove the attachments, then the valve cover and the camshaft bed. The hydraulic lifters turned slightly blue from oil starvation, but the client was lucky - the camshaft necks and the bed in the cylinder head are in good condition - here expensive repairs can be avoided.
We remove the cylinder head - this is the reason for the escaping antifreeze - a burned-out gasket. Judging by the rust, the previous owner did not want to repair the engine and filled in water, so he sold the car. The plane of the head requires milling.
The cylinders are still in very good condition, the factory hon is visible. Water entered the second cylinder through the gasket, and traces of rust are visible on the surface of the cylinder. However, the water here has not yet had time to cause wear on the surface of the cylinder - if the client had traveled on the water for a longer time, there would have been no trace of honing.
The catalyst is sentenced to be replaced - the gas joint studs have stuck tightly, but the main reason for the replacement is that the insides of the catalyst are sintered and crumbled.
| Video (click to play). |
We dismantle the cylinder block from the car - without its complex bulkhead and troubleshooting - further assembly and starting of the engine will be like a tape measure.
We completely disassemble the block. All crankshaft journals are measured with a micrometer - journals without wear, at the upper tolerance limit. But the inserts, especially the root ones on the last neck, have traces of oil starvation. A little more - and the insert could turn. The seating plane of the block, which has extensive areas of corrosion, was milled.
Since there was no talk of tuning the engine (the client asked for a standard overhaul), they did not install the ShPG from Priora. Since the cylinders are in good condition, they limited themselves to replacing the pistons (group B was in the engine), they put group C. The connecting rods remained native, 2110. The piston rings were replaced with type-setting ones, Kolbenschmidt. Such a replacement will still add a few horsepower to the motor, by reducing mechanical friction losses. All parts were washed. The oil pump was opened and the gears, body and parts of the pressure reducing valve were carefully examined - no defects were found. The crankshaft liners and persistent half rings were replaced with new ones, the crankshaft remained in the nominal size.
Updated all oil seals and gaskets. They installed a new pump - the factory one. The flywheel is still in excellent condition, the clutch is also - the previous owner changed it to Kraft. We limited ourselves to replacing the release bearing with a VAZ one (the Kraft release bearing has a weak point - a plastic inner sleeve, which often crumbles).
It's time to take care of the head. It was completely disassembled by drying the valve. The mating plane has suffered from water and rust, traces of the gasket burnout are visible.
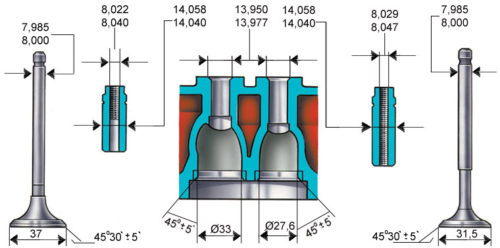
Outlet guides are worn out - valves are loose. The valves themselves are in good condition - we grind the working chamfers on a special machine, thus the client saves on new valves.We repress the exhaust bushings with new ones. The valve stem seals have turned into croutons, they are also replaced with new ones - GOETZE. The head is washed, the plane is milled, the chamfers of the saddles are machined on the AZ VV80 machine - the cutter creates three chamfers at the same time, after which lapping is not required. The valves simply dry out.
We update the timing belt and rollers - put the kit PowerGrip (GATES)... We put the cylinder head gasket from the Priora. Oil filter - MANN. The catalyst is replaced with a 4-1 stainless steel "spider". It is put in place. It was not possible to find an intermediate pipe from the catalyst to the resonator on sale - it was necessary to cut off the sticky catalyst pins and use the old pipe. The gas joint (with a new gasket) is connected with hardened bolts with copper nuts and grovers. We also update the round graphite ring in the next gas joint, along with bolts and springs.
We glue the camshaft bed and the valve cover on the anaerobic sealant Loctite (silicone sealants cannot be used!), Update the candles - install NGK. New hydraulic pushers were supplied - INA. We fill in oil with Lukoil Lux 10W40.
So, everything is assembled, we start the engine. The pressure lamp goes out, the wetsuits fill with oil and die down. The motor runs smoothly.
After an hour of idling, the car is handed over to the client.
The results of the overhaul are summarized in standard estimates, which can be found in the Price List section.
Posted on August 27, 2012
Cars of the VAZ-2112 family were produced with one of two 16-valve engines - 21124 and 21120. The working volume of these engines is different, and only one part called "cylinder head" is used - it is designated by the numbers 2112-1003011. It is rumored that the cylinder head from the 21120 engine does not fit the 24th engine, but a reverse replacement is possible. However, there is only one SKU in the parts catalog, and it fits two motors at once. Further, it is considered what actions to repair the VAZ-2112 cylinder head you can perform yourself. We will only talk about 16-valve valves. An example of dismantling is shown in the video. We look. First of all, to get to the cylinder head, you need to remove the cylinder head cover. For different 16-valve valves, this operation is different, and the article numbers for the cover also look different: 2112-1003260 (-10) and 21124-1003260. Cover from the internal combustion engine VAZ-21124 (1.6 l) The timing belt will also need to be removed - there are no differences between different engines. Consider how you can detach the exhaust manifold from the cylinder head. On engine 21120: Everything important is under the screen Now we will talk about the 21124 engine: How to disassemble the mounting bracket Operation with additional silencer Here we considered that the VUT hose was disconnected from the intake module. In the final, on any of the engines, the candles are unscrewed (pipe wrench "16"). The tightening torques for the fastening screws are given in a different text. In general, on VAZ-2112 hatchbacks, cylinder head repairs begin by replacing the "elongated" screws with new ones. The length must be 95 mm or less. The procedure for loosening (left) and tightening the fastening screws Taking a wide steel ruler, they check: Measurements are taken along each of the diagonals. Use a set of probes. To remove any valve, you will need to remove the camshaft. All screws on the bearing housing must be unscrewed evenly, and tightened with a force of 10 N * m. The hydraulic compensator can be removed with a magnet, and then the valve is dried by compressing the spring with a puller (see photo). Carbon deposits may be present in the valve passages. It is cleaned off: Lapping is carried out as follows: a rubber pipe is put on the valve, a paste with diamond chips is applied (one drop), then the valve is pressed into the channel and scrolled. It will be possible to change the valve stem seals (2112-1007026). You can't do without a special puller. On any car, including the VAZ-2112, cylinder head repair is reduced to cleaning and checking, as well as correcting geometry defects. In the latter case, we are talking about milling. The presence of cracks and chips is a reason for replacement, not for repair. The burned-out valve can be seen immediately. One valve in cylinder 2 burned out Carbon deposits were found in each valve channel. Carbon deposits in the cylinder head channels Repair: cleaning all channels, replacing the valve with lapping. Before proceeding directly to the cylinder head repair process, it is worth noting that the head must be completely disassembled and all the necessary spare parts purchased. Consider the process of a complete overhaul of the cylinder head. The process of washing car spare parts with hot kerosene In order to wash the head, it must be completely disassembled, that is, all parts that can be easily removed are dismantled. A full wash requires 12 liters of hot kerosene. In car services, this is done using a spray that delivers fluid under pressure. So, all the dirt and remnants of metal shavings are washed off. Washing is carried out until the cylinder head is completely clean. Cylinder head crimping process Crimping is a process by which the integrity of a part is checked. Crimping can be done in two ways, which are similar in principle. The first is to close all the cracks and fill the part with water. There is, somewhere water comes through or flows, then the integrity is broken and repairs are needed. The second method is to close all the cracks and the head is immersed in an aqueous solution. It will immediately be seen where the depressurization of the part takes place. If the integrity of the head is damaged, then it is necessary to restore it. The valve seats must be removed before continuing with the rest of the overhaul. In the best case, they will easily knock out of the seat, and if not, then you will have to use Russian ingenuity. The valve is welded to the seat and knocked out of the seat So what if the valve seats aren't knocked out? The solution is simple. It is necessary to weld a tube to them so that the working end passes through the channel of the guide sleeve and knocks out until the saddle comes off the landing mount. Of course, cracks can form on the seat ring of the saddle or a piece break off. After completing the procedure, it is necessary to inspect the place and, if necessary, weld with argon welding. Often, repairing the cylinder head is not complete without checking the plane. This can be done by contacting a car service that has a test stand, or by asking a neighbor in the garage for a special ruler for measuring the plane of the cylinder head. Measurement of the cylinder head plane for deformation using a metal ruler and a probe Important! It is recommended to give such block heads to a car service with the proper equipment, since only there they will be able to measure the plane and grind it to the desired size. So, if there is a deformation on the block head or the plane has a deflection, then it must be sanded. This operation is done on a special surface grinding machine. Usually, the auto repairman is advised not to remove more than 10 mm of thickness. Consider the possible options for grinding the cylinder head by dimension: Cylinder head surface grinding process Note! If you remove the thickness of the plane more than 10 mm, then this can lead to incorrect operation of the timing mechanism, loss of power and an increase in fuel consumption. Argon welding is welding work that is carried out on aluminum. For this, a special gas is used - argon. So, to eliminate cracks and weld defects in the seats of the valve seats, it is required to weld them, and then carry out milling work on special equipment. The process of repairing cracks in the cylinder head using argon welding After the welding and milling work has been carried out, it is necessary to bring the surface to readiness. For this, the cylinder head is placed on a special stand, where the surface is polished using a special paste produced by ABRO or its analogues. This is necessary so that the surface does not have roughness. When this procedure is completed, it is necessary to once again wash the part from metal chips and residues of working material. It is best to assemble the cylinder head at a special stand. When the block head is processed and washed, you can proceed directly to its assembly. But, before that you need to carry out preparatory work. Let's consider all the stages of the assembly sequentially: On a special stand, the valve chamfer is processed Valve seat shrinkage process steps Valve Lapping Process Thus, a major overhaul of the cylinder head of a 16-valve VAZ 2112 engine is being carried out. This process will take 1-2 days at a car service, but a motorist can spend much more time in his garage, since the lack of a tool will affect. So, it is recommended to repair the cylinder head at car services, where everything will be done much faster and better. Of course, this will hit the pocket, since a high-quality and overhaul of this part will cost on average about 7,000-10,000 rubles. together with spare parts. If the engine of your car starts to work “strange” and you decide to make a repair. The first step is to remove the engine, since it is impossible to fully repair the installed engine. The 2112 engine is located on four bearings. The left and right supports are similar to those of the VAZ 2110 and 2111, and the rear and front ones are similar to rods, with rubber-metal pads. If the hydraulic pushers are out of order, then repair is needed. After dismantling the plastic cover and the receiver. Before repairing, cover all openings of the intake manifold with something to prevent debris from getting into them. If available, remove the ignition module. Ignition module, dismantled with a 10 mm head. Then you need to remove the crankcase ventilation hose from the HZ cover. With the help of a 10 head, the bolt is turned out, which secures the injector wiring harness. Now you need to unscrew 15 bolts from the cylinder head cover mounts, as soon as they are unscrewed, remove it. It is necessary to check the hydraulic pusher, press on it with a screwdriver, if the hydraulic pusher is working, then it will be squeezed with considerable effort. In the event that it is not working properly, it must be replaced. We take the "8" head in our hands and unscrew the 20 bolts on which the camshaft bearing housing is attached. Do not forget to unscrew the bolt securing the rod to the rear support of the power unit. The head "15" is used to unscrew 3 nuts, on which the bracket of the rear support is attached, then we remove it. You need to get the spark plugs out. Next, you need to dismantle the two "rear" HZ plugs and, of course, the camshaft bearing housing itself. The new hydraulic pusher is placed in the nest.Before proceeding with the assembly, you need to carefully clean the HZ from oil and sealant residues. Support cams and journals must be lubricated with oil, then the shafts are installed in the cylinder head supports. The bearing housing is placed, after which the fastening bolts are evenly tightened. New camshaft oil seals are pressed in. Plugs are pressed onto the back of the cylinder head. Everything, we can say that the repair of the VAZ 2112 engine has been completed. Further assembly is carried out in reverse order. Video on overhaul and assembly of an engine, a VAZ 2112 car, as well as detailed instructions with photo support for disassembling a VAZ 2110 engine. Repairing the VAZ 2110 engine, like any other model of the car, is not an easy job, but still performed. If you are at least a little versed in the technique, then you will be able to perform it. To carry out repairs, you must at least disassemble the engine. We bring to your attention a hint on how and in what sequence to carry out such work. 3. Remove the tension roller, camshaft drive belt and spacer washer that is installed under the tension roller. 4. Remove the toothed pulley from the camshaft. 5. We unscrew four bolts, three of which are attached to the water pump. We unscrew the fastening nut on the rear cover of the camshaft drive belt and remove the cover. 6. To remove the water pump, insert a screwdriver between the block and the pump casing flange and thus slide it out of its seat. After completing these operations, we remove the water pump. 7. Remove the head from the cylinder block. 8. Unscrew the bolts (16 of them) securing the oil sump, then remove it together with the gasket. 9. Unscrew the bolts (3 of them) fastening the oil receiver and remove it. Note that there are spring washers under the bolt heads. 11. Then rotate the crankshaft so that the piston that is being removed hits the BDC (bottom dead center). It is necessary to unscrew the two fastening nuts to remove the connecting rod cover. 12. Now remove the connecting rod cover. In the case when it is difficult to dismantle the cover, you can first touch it with light hammer blows. It may be that the number of the cylinder on the cover will be invisible, in which case the cover should be marked with the number of the cylinder. 13. Using the hammer handle, push the connecting rod into the cylinder, then carefully remove the piston with the connecting rod from the cylinder. In the process, you need to make sure that the lower head of the connecting rod does not touch the cylinder mirror, as this can damage it. Remove the rest of the pistons in the same way. 14. If it is necessary to remove the piston from the connecting rod, then we mark it with the cylinder number so as not to confuse them during installation. On the connecting rod, the same must be the cylinder number: if it is not visible, then we mark the connecting rod. 16. Unscrew the bolts (there are 6), remove the crankshaft rear oil seal holder and gasket. Remember that there are spring washers under the bolt heads. 17. From the crankshaft, remove the toothed pulley. In the case when the key does not sit tightly in the groove of the shaft elbows, we must take it out so that it does not get lost. 18. Unscrew the six bolts, under the heads of which there are spring washers, and remove the oil pump and gasket. 19. We unscrew the mounting bolts on five caps (each with 2 bolts) of the main bearings. 21. Remove the crankshaft of the VAZ 2110 car. 22. We carry out the removal on the middle support of the persistent half rings of the crankshaft. 23. If it is not planned to replace the liners, then as they are removed, we take them out of the block beds and from the main bearing caps. 24. On the non-working side, we mark the inserts relative to the beds and covers. 25. If there is a need to remove the engine mounts and generator brackets, unscrew the bolts (3 pieces) of their fastening and remove the supply pipe of the water pump by unscrewing its fastening. 26.We remove the piston rings using a special puller. If there is no such device, then remove the rings from the piston, carefully opening the ring locks. 27. Remove the oil scraper ring expander spring from the engine piston. 28. The retaining rings that hold the piston pin are removed from both sides of the piston. Recesses are provided in the piston bosses for easy removal of the rings. 29. Using a suitable mandrel, push the pin out of the piston, then remove the piston from the connecting rod. 30. Take out the inserts from the connecting rod and its cover. If they remain on the crankshaft, remove them from the shaft. If the replacement of the liners is not required, then as they are removed, we mark them with respect to the numbers of caps and connecting rods. This completes the process of disassembling the VAZ 2110 engine. Successful completion of the renovation. Remove the plastic cover, unscrew the receiver mount We remove the throttle cable, connectors from the diesel fuel, the solid propellant engine and the nozzle harness. We unscrew the ground wires. Receiver, MZ, BB-wires, candles removed. Using a 10 key, unscrew the timing belt cover bolts We unscrew the ground wire and the bracket for attaching the gas pipes. The front right wheel is already on the jack. We combine the marks and unscrew the bolts of the camshaft gears and the roller nuts. We remove the gears (do not lose the keys), rollers and the back cover (you may have to remove the pulley for the alternator belt from the crankshaft). Before unscrewing the bolts securing the head cover, their thread must be upset with a slight blow of a hammer through the knob on the head Also, having previously besieged, unscrew the two bolts of the ramp fastening, with a hexagon. Having unscrewed one bolt, we take out the probe assembly with its trunk. We take out the ramp together with the nozzles, shifting it to the right and ourselves. We put it to the side without unscrewing the hoses. This bracket will get in the way and must be removed. Unscrew a bunch of camshaft pastel bolts and remove the middle part of the head. I starred with the camshafts. Carefully remove the camshafts and spark plug wells. We take out the hydraulic lifters with a good magnet, put them in a clean, dust-free place so that then each one can be put in its place. The oil seals did not flow, but they did not have long to live. We replace them with new ones. The wells were leaking. The bottom turned into a thin, snotty substance. Because of the importance of the moment, I forgot to photograph the process of unscrewing the head bolts. They must first be settled and unscrewed with a GOOD hexagon. We remove the head from the engine. We begin to dry out the valve. With tweezers and an awl, we take out crackers, with toothy pasatizh we remove the old MSCs, we put on the new ones with the help of a mandrel. MSCs are hardened and the inner diameter has increased. Timely replacement! The inlet valve is heavily soiled. We clean it with a knife and sandpaper. Similarly, there is an outlet in the head ... With a sharp knife and sandpaper, remove the remnants of the gasket from the surface. On this side, remove the remnants of the sealant. Thoroughly rinse your head with gasoline. VAZ-21113, manufactured in 2000, engine 1500, 16-ve, mileage 95,000 kilometers. Let's move on to the block. With a sharp knife and a small skin, remove the remnants of the old gasket and clean off the carbon deposits. Remove the oil pan and oil receiver. We unscrew the two connecting rod nuts and pull out the piston with the connecting rod up. The arrows indicate the rubbing surfaces. The crankshaft connecting rod journal is in excellent condition. There are no scratches on the cylinder mirror. Traces of hone are still visible. Fine! Mileage 95,000 kilometers. There is no wear. Remove the first compression ring from the piston and insert it into the pot. Below, in the middle and above ... We measure the gap in the ring lock. Correct clearance. We also measure the second compression and oil consumption. We clean the grooves in the piston with an old, broken in half, ring. We insert new rings. First, oil-rich ... ... then the second compression ... ... then the first compression. Put on the rings carefully, otherwise they can break, especially the second, cast iron. Insert the piston using a mandrel, correctly positioning the connecting rod ... ... gently tapping the hammer handle. We replace the rubber ring on the oil receiver and lubricate with sealant. We coat all surfaces of the pallet, new gasket and block with a thin layer of sealant. We put the pallet in place. It is better to replace the pump tee gasket, then it will be much more difficult to do it. We clean the holes for the cylinder head bolts. We put a new gasket on the front pipe and on the block. Carefully put the head back in place and tighten the bolts in four steps. We clean the middle part of the cylinder head from rubbish. Having liberally lubricated with engine oil, insert the hydraulics and camshafts into place. We coat with red silicone sealant around the perimeter. ... and in the center, where the bolts on the counterpart are also. Be sure to check all three TDC marks and stretch the bolts. Candle wells. We put on elastic bands, smear with sealant ... .. rubber bands in place, more grease and wells in place. Having smeared the top cover of the cylinder head with sealant, we install it in place We start the engine and enjoy the increased self-esteem All modifications of the VAZ-2110 have a number of typical features that distinguish these cars from other vehicles of a similar type. Let's consider them: The VAZ-2111 engine is equipped with a power system that has a distributed fuel injection, and it is controlled by one of the controllers - January, Bosh, GM. But any such design used on the VAZ-2111 must meet the following requirements: This model is a modernized version of the VAZ-2110 engine, which belongs to the carburetor type. The modernization was carried out in order to smoothly transfer to another power supply system - injection. So, four cylinders made of cast iron, and the connecting rods have a more massive lower part, which makes it possible to increase the functions of the motor resource up to 250 thousand kilometers in real conditions, although the manufacturer assumes 150 thousand kilometers. By the way, when carrying out repair operations, the nominal diameter of a cast-iron cylinder of 82 millimeters can be increased from 0.4 to 0.8 millimeters. But at the same time, the maximum limit of its permissible wear should be taken into account - 0.15 mm per diameter. The crankshaft is also made of high strength cast iron. Special inserts are produced for it, intended for repair, which are specially reduced to 1 millimeter. On the VAZ-2111, the engine is included in the power unit, which also includes the clutch and gearbox. This unit is a unit of a single type that is mounted in the engine compartment with rubber-metal elastic mounts. Specialists also refer to the repair work as removing the engine itself from the vehicle. But this procedure is carried out already at the moment when the car needs a major overhaul. Under the overhaul work related to the VAZ-2111 engine, experts mean the following operations: If you decide to repair the VAZ-2111 engine on your own, without contacting qualified specialists of auto repair shops, then the book "Manual for operation, maintenance and repair: VAZ-2110, VAZ-2111, VAZ-2112" from the series "With your own hands ". This guide was written by a team of authors, published in 2012. Summary: In addition to clear and intelligible technological instructions, it contains 15 electrical circuits, as well as photographs with comments. These replacements are necessary, albeit periodic. They will allow not only to increase the resources of the engine, but also to change the quality of its work. Experts consider current repairs to be a temporary measure, and sooner or later the entire power unit of a vehicle may fail. Therefore, major repairs make it possible: Of course, it is best to entrust engine repair and maintenance to knowledgeable and qualified car service technicians. There is a special offer on our website. You can get a free consultation of our corporate lawyer by simply asking your question in the form below. Hello everyone. I decided to capitalize the heart of my friend. along the way I want to ask experts about the intricacies. So, here is an approximate list of spare parts: piston 2112 (without grooves) autoromat, Zavolzhsky connecting rod bushings; if you have a 16 valve, then it makes sense to immediately put a piston with grooves, because this will save you from unpleasant repair costs in the future in the event of a timing break I thought about it, but I was reluctant to fence the collective farm, I thought about it, but I was reluctant to fence the collective farm, why collective farm? The collective farm will be when you touch your head 😉 Hello everyone. I decided to capitalize the heart of my friend. along the way I want to ask experts about the intricacies. So, here is an approximate list of spare parts: piston 2112 (without grooves) autoromat, Zavolzhsky connecting rod bushings; Put the pistons from the 124 engine, you are advised correctly. The rings can be put on the “SM” Zavolzhsky earbuds are an excellent option. Mileage 183 tkm, mileage to Baikal 4 tkm, 1200 of them back on 2 and a half cylinders, the malfunction manifested itself as a strong loss of power and a wild ringing (metallic) that a comrade heard in the car from behind. Solving the problem on the spot - threw off the connector 1 of the injector ringing disappeared. In addition to spare parts, I bought a torque wrench, a mandrel for rings, a desiccant and mandrels for valve stem seals + 2.5 rubles, chemicals for cleaning 1 rubles I thought about it, but I was reluctant to fence the collective farm, Everything rises like a native, except for what is missing to the valves, the compression ratio decreases from 10.5: 1 to 10.2: 1 according to my calculations, some say that it’s no longer an issue. the valve guides remained in question, or rather the method of replacing them Gates - a belt like a belt, if not singed. Slightly thinner than BRT, but with a touch of gesture. I am in terms of the reliability of the belt, I am interested in the resource of the gate, if it is the same as that of the brt, is there any sense in it I am in terms of the reliability of the belt, I am interested in the resource of the gate, if it is the same as that of the brt, is there any sense in it The resource is one to one, like the BRT. The resource is one to one, like the BRT. in principle, since the price is almost the same, then the resource is approximately the same
The author of the article, photo-video materials:
Remove the exhaust pipe of the muffler: unscrew two nuts 1 (key "13"), remove the clamping bar, unscrew six nuts 2 (key "14") and dismantle, not forgetting to turn off the oxygen sensor. The photo shows three nuts out of six.
The direct implementation of the repair of the VAZ 2112 cylinder head will require several operations in which some special equipment is needed. Of course, at home there is no such possibility, and motorists simply replace worn out parts. Next, we will consider the process of repairing the block head, as well as some of the nuances associated with this work.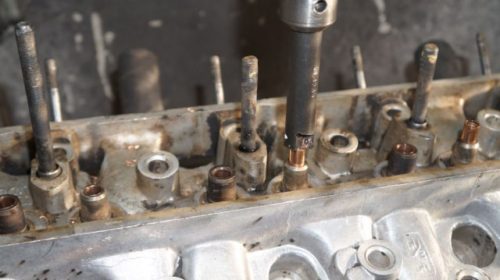

Costs:
1. Rings "Male" - 710
2. MSK "Elring" - 190
3. Head gasket - 220
4. Laying pr. Pipe of the collector - 60
5. Pallet gasket - 40
6. Hydraulic compensators 2x60 - 320
7. Oil seals for camshafts 2x60 - 60
8. Sealant "red, silicone" - 70
9. Motor oil - 528
10. Oil filter - 89
11. Fuel filter - 91
12. Air filter - 76
13. Guide for MSC - 50
14. O-rings into wells - 210
15. Breather pipe - 50
16. Clamps 6 pieces - 72
17. Receiver hairpin - 25
19. Pump tee gasket - 3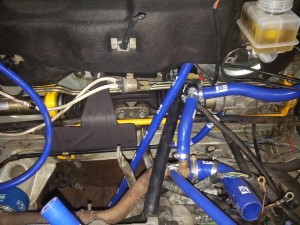
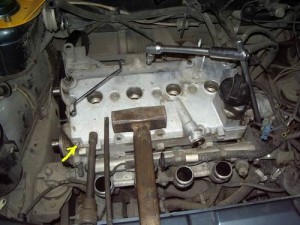
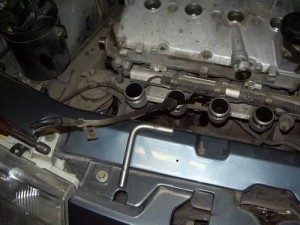
The question on rings is open there is no special assortment, but from what there is, what to choose: stk, sm, keno, mahle, in one I found an AvtoVAZ for 600r I do not know real or not
leave the connecting rods with relatives or take new ones;
what to do with the valve guides if there is wear, knock out with a mandrel or make a puller and warm your head or not
From Slyudyanka to Krasnoyarsk with an overnight stay in Irkutsk I drove myself, the speed in a straight line 120 uphill 70 km / h.
The analysis of the driller showed a breakdown of the 1-2 cylinder gasket, the separation of a part of the baffle between 1 and 2 rings, the wear of the cylinders per ellipse was measured as 7 microns in all pots, except for 4, which gave 2 hundredths,
but after letting go of the box the same 7 microns!
I did it myself for 2 days unhurriedly, saving at least 10 sput for work + a lot of fun. 


Good luck to all!!
Another important thing is that you can painlessly pour 92 benz, my experience shows that 1-2 refueling garbage and knocks out the gasket because it detonates at the same compression ratio as on a diesel
![]()
![]()
![]()
Video (click to play).


