In detail: do-it-yourself electronic trade scales from a real master for the site my.housecope.com.

Electronic weights, after prolonged use, also fail. Although electronic floor scales are a simple electronic device with few electronic components, it will take a little time to detect breakage and repair the device.
If your electronic weights do not show any signs of life at all, you first need to try to change the battery, as a rule, they are powered by a 3-volt coin-cell battery, and you should not test the scales with a battery from another device, the scales need only fresh and stable ones to work. battery voltage of 3 volts, otherwise some devices may not "start" when the voltage drops to 2.8 volts.
So, if we are convinced that the device does not work with a new battery, we need to disassemble and inspect its insides.
After we have unscrewed all the screws and removed the cover, we need to inspect all visible and accessible connections and installation of radio elements, as well as the integrity of all parts.
It often happens that during operation the wiring going to the board is shaved, or it seems to be still in its place, but already from rotting, you need to lightly try the reliability of their connection.
Found torn wires must be soldered back, and damaged tracks must be restored. The place of the defect is protected, degreased and tinned, a jumper or a large drop of solder is soldered on top. It is advisable to cover the soldering point with a special varnish or simply nail varnish.
Displays in such scales are liquid crystal, as a rule, and are connected to the board either with a ribbon cable, or with a multi-pin conductive "rubber band". It often happens that the rubber band does not adhere well to the board or the display glass, in such cases the image on the display wakes up distorted or incomplete. In such cases, it is necessary to rinse the gum and the board contacts with alcohol, install in place and make sure that the screws fastening the board are reliable, if there is a suspicion of insufficient "tightening" or a loose thread for the screw, you need to press the board against the gum by any means, for this you can, for example, put a small a block of foamy materials such as polystyrene between the board and the back cover, or try to restore the thread density with the help of "moment" glue.
| Video (click to play). |
All electronic scales have a weight limit that should not be exceeded. When exceeding, as a rule, more than 150-180 kg, the load-bearing elements of the frame structure may bend. Of course, they can be straightened, but such a "repair" will clearly affect the previous accuracy of weight measurements.
In addition, when the weight is increased, one or more measurement sensors, which are located at four corners and are fixed on the load frame, may break. The sensor for measurement is a strain gauge, you can check with a tester, for this we unsolder all four sensors from the board and measure the resistance of the sensors.
In the unloaded state, the resistance of all sensors should be approximately the same, if one of the sensors has large deviations in resistance values, then it is clearly faulty.
It is very difficult to try to repair such a sensor, since it is filled with compound and it is easier to find four new strain gauges or one sensor with identical resistance values from a similar model of scales.
But if you cannot find a new sensor, you can try to carefully pick out the glue (compound) inside there is a copper-colored plate to which three wires are soldered, sometimes it happens that one of them is cut off and it is enough to solder the wires in place and the sensor will be restored.
- If the scales show only ZERO regardless of the load, then either the load cell is out of order, or there is an open circuit in the circuit from the sensor to the ADC.
- If the scales do not show anything, then the reason may be either a problem with the power supply (battery) or a break from the board to the “power buttons” which are usually located inside the power frame on two legs of the scales remote from the display.
It often happens that weights fail due to dust and small debris getting into them, as well as when operating them in a humid environment... Perhaps it will be enough in such cases to clean the board and radioelements and dry all the weights.
Sometimes it becomes necessary to calibrate the weights, when replacing load cells or incorrect calibration, for example, when the weights are very false. To do this, you need to press the button to enable them and hold it until you see “CAL” on the display. Then the numerical value of the mass will appear, with the help of which the calibration will be performed. Any object whose weight you know can be used as a reference. Place it on the balance and after a few minutes the display will show “PASS”, then you will need to delete this inscription, turn off the balance, and then turn it on again.
Before repairing the scales, it is necessary to determine the nature of the malfunction. Electronic scales, like many other devices, fail after prolonged use. Being an uncomplicated device, with a minimum number of uncomplicated elements, weights belong to the group of easily repairable devices. This principle can be found in commercial, kitchen, children's and laboratory devices. However, if they are broken, do not display the weight correctly, or do not work at all, in order to find them to be repaired and restore them to working condition, you need to spend a little time. The repair of this technique differs from the restoration of a mechanical balance.
Displays in modern electronic scales are liquid crystal and, as a rule, are connected to the microcircuit either with the help of an internal loop, or with the help of a special conductive "rubber band". It so happens that it is not tightly adjacent to the board or display. In this case, the image on the display will be distorted or incomplete.
In case of problems with the image, you need to rinse the gum, clean the contacts of the microcircuit with alcohol, reinstall everything and check the reliability of the screws with which the board is attached. In case of unreliable fastening, or a thread break from the screw, it is necessary to better attach the board to the elastic band.
To eliminate a malfunction in the balance, it is necessary to replace the battery in it.
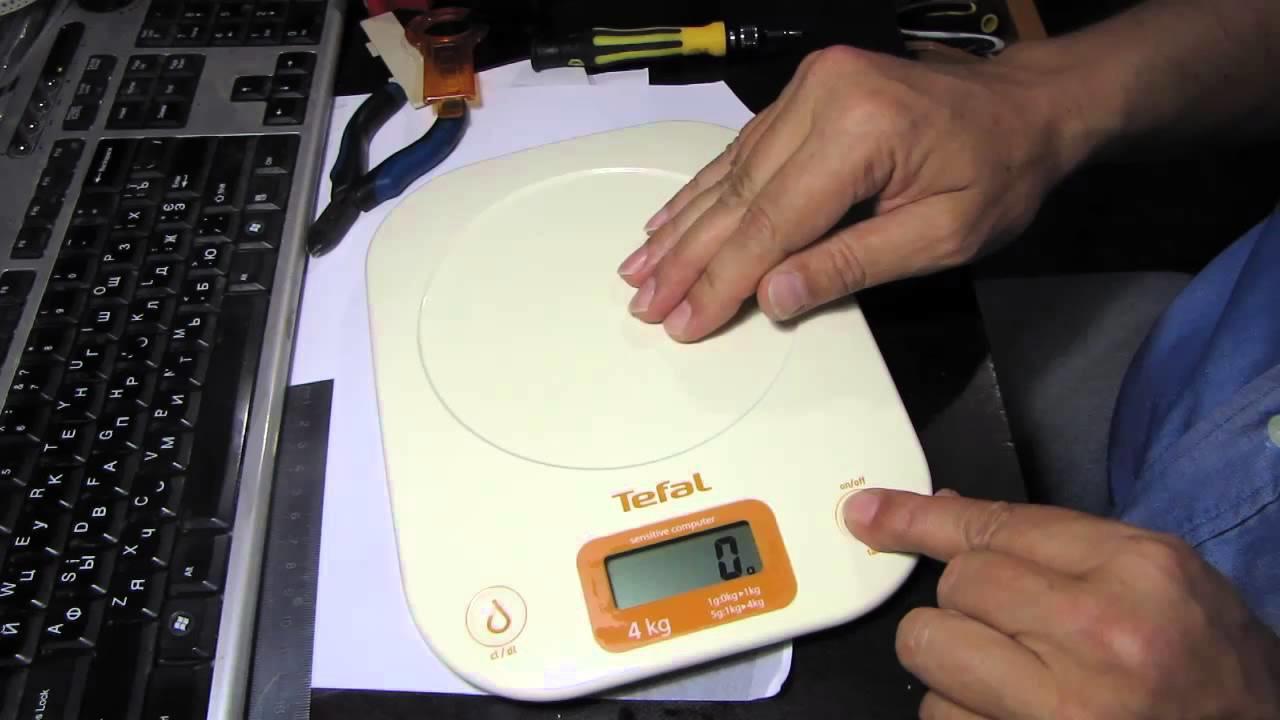
All scales operating on electronics, such as those of Tefal or Grodno companies, have a weight limit, which should not be exceeded. If the permissible values are exceeded, as a rule, it is more than 150 kg, the device may deform, the power elements will lose their elasticity. As a result, the device may malfunction.
In addition, the following factors affect the correct operation of the device:
- If the permissible load is exceeded, the measurement sensor located on the power frame may break;
- The scales will not work in the event of failure of one or several parts of which the structure itself consists;
- Often, during operation, the wire leading to the microcircuit breaks.
If, having eliminated these minor misunderstandings, you see that the device still does not work, or shows an error (Err), then you need to take it to the specialists in the service center for more in-depth testing.
All electronic scales operate on the same principle, which means that their main faults are of a similar nature. The scales are designed in such a way that their sensor can go astray at any moment. Then you may notice that they are lying, or the digital electrical panel is just jumping. Why did they go astray, what can be done, and how to fix the situation?
For people who are at least a little familiar with the laws of physics, it will not be difficult to set up an electronic scale on their own. It is enough to carefully follow all troubleshooting procedures.
Adjusting the device is not a complicated procedure, if the scales simply go astray, then it will not require replacement of parts
Self-repair of the scales is also good because in this way you do not need a workshop, and you can save money on calling the master. In addition, in the main, the malfunction turns out to be a trifle, and it will not be too difficult to complete it yourself. It is possible that the battery in your device is simply discharged. Or maybe you need to calibrate.
When it becomes necessary to calibrate the weights, the following should be done:
- Press the power button;
- Hold it until the word “CAL” appears on the board;
- Place an object on the scale, the mass of which you know for sure;
- When you see the digital value of the mass, adjust the indicator;
- After the message “PASS” appears on the screen, remove the inscription;
- Switch the balance off and on again.
Your instrument should now be working properly. If problems persist, look elsewhere for reasons.
Electronic scales work on a different principle than mechanical ones. However, whatever the complexity of the device, the scheme of operation for all electronic devices is the same. It is based on measuring the resistance of a strain gauge. In this regard, the repair of all electronic type scales is carried out according to a similar scheme.
Whatever your home bathroom scale is, the only difference is the electronic filling. All models that determine the biometric parameters of the human body are just a set of resistors with microcircuits. These devices are no different from the primitive Chinese pink flooring devices for teenage girls.
Accurate knowledge of the principle of operation of the floor scale will make it possible to independently carry out minor or major repairs to the device
It is not recommended to undertake repairs of electronic floor scales that are under warranty. Especially if these are expensive and branded products. It is better to take them to a service center, where specialists will conduct high-quality testing, repairs and preventive measures. Those who decide on homemade repairs of electronic floor scales, before disassembling the device, should know their device.
Electronic floor scales usually consist of the following fundamental elements:
- Load cell;
- Electronic printed circuit board;
- Display;
- Buttons.
Of all this, you will not be able to repair only the display yourself. If it has turned black or all sorts of terrible patterns have appeared on it, then the crystals are destroyed, and it is no longer possible to save it.
If you are convinced that the reason for the breakdown of your scales is not in the batteries, but somewhere much deeper, and are set to repair the device yourself, then first disassemble the device by removing 2 3-volt batteries, and unscrew the bolts on the bottom cover of the case. Then, conduct a visual analysis of the apparatus. Inside the device you will find 4 legs, a battery compartment, a printed circuit board, wires and a screen with buttons. The front and rear legs have a slight difference in the form of a rubber ring and additional contacts with wires.
At the moment of the first pressing on the scales, the rubber ring of the serviceable devices is flattened, the contact is closed, and the scales are turned on. After that, the system waits for another button to close, which means the person's second leg on the scale.
If your scale stops working due to minor troubles, it will recover and you only need to calibrate
Carefully inspect all parts and assess the quality of the electrical connections, the integrity of the electronic board and the serviceability of all parts. If a malfunction is found, determine the nature of the malfunction and proceed with the repair.
Step-by-step instructions for repairing electronic scales:
- All torn wires must be soldered in place;
- If the cable that connects the board and the display does not fit tightly, then slightly lift the microcircuit and, more tightly, press it to the display.
- Using a small piece of wood, install the retainer on the bottom of the scale body;
- Clean the inside of the device from dust and debris;
- Align the inner frames if necessary;
- If the paths of the microcircuit are damaged, then it is necessary to clean the place of the defect with sandpaper, treat the place of damage with a degreasing agent and plunge it. Solder the jumper on top, after which the damaged area should be varnished;
- In old scales, the ends of the contacts may have worn out, check them and replace if necessary;
If all of the above procedures did not help, then the malfunction is hidden deeper.
If the sensor is faulty in the device, then you should find out the degree of its defect. In the case when the element is completely unusable, it just needs to be changed. After that, again, you need to calibrate the device.
Most bathroom scales are made according to the same principle, so they all have the same breakdowns. To learn how to fix electronic floor scales, you will need to learn several important nuances.
The product consists of several elements. As a rule, experts distinguish the following parts of it:
- display;
- frame;
- printed circuit board with various microcircuits;
- strain gauges.
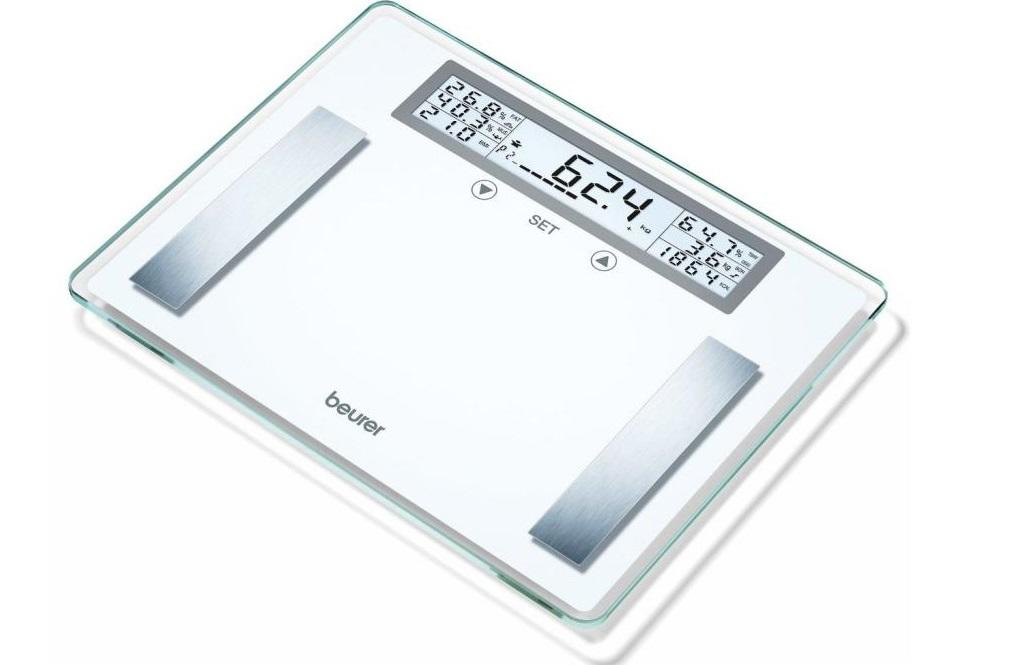
Classic bathroom scales with glass body. Possesses display, circuit and 4 sensors
The body of the product can be made of plastic, glass or metal. Each option has its own advantages. If the case is deformed, it is almost impossible to repair the scales.
The most important part of the balance are load cells. They are metal plates that are located on the back of the product.
Open load cell plate. The sensor converts the deformation force into kilograms
There is a board inside the product that reads the data and displays it on the display. The functionality of the balance depends on the electronic board. 4 sensors are connected to the board. The whole structure is securely protected by a casing. The display on most devices is black and white. It displays all the necessary information well.
The device is powered by a battery. A miniature battery (coin cell) is being used
There is a list of the most common breakdowns. There are the following reasons:
- loop failure;
- reducing the area of the contact ends;
- failure of electronic board elements;
- break of contacts;
- calibration problems.
The balance may not work due to a dead battery. In this case, you only need to replace the batteries yourself.
You need to start diagnosing the device with finding simple problems.
The device is made of tempered glass, which rarely breaks down due to the high strength of the case
The process of operating the bathroom scale includes constant pressure on its surface. After that, the load is evenly distributed over the sensors. Metal strain gauges can fail due to the passage of time. If one of them sends a wrong value, the balance will start to show the wrong weight.
If the scales do not work, then repairing the scales with your own hands is a difficult procedure. Most problems require the use of a dedicated tool. You also need to have skills, for example, to cope with replacing and soldering a new contact.
To diagnose a breakdown, you will need to check each element of the product. If the scales have completely turned off and will not turn on, you need to disassemble them and check the integrity of all wires. If they show incorrect data, then you need to look for the problem among the strain gauges.
It is extremely problematic to independently carry out diagnostic measures. You will need to perform the following algorithm in order to find the problem:
- Inspect the balance carefully for deformation.
- Remove the protective feet from the load cells. Inspect metal plates.
- Disassemble the case. Check all internal components.
In order to disassemble the case, you will need to unscrew all the bolts
On some devices, the bolts may be hidden behind a sticker. Before opening the balance, make sure that all screws have been unscrewed, otherwise the case may be damaged.
To restore the device to work, you will need a special tool. It is necessary to prepare in advance:
- soldering iron (may be required if there is a wire break);
- small screwdrivers.
Spare sensors may also be required. They can be purchased from a specialist store or removed from other products. At home, a person can only fix minor breakdowns. If difficulties arise, they turn to specialists. In every city there are companies and craftsmen who are engaged in repair work.
What are medical bathroom scales and how to choose them, read here.
For a successful repair, you will need to follow a simple algorithm of actions. If a person wants to know how to repair electronic floor scales, he should familiarize himself with the step-by-step instructions for repairing.
If the balance breaks down due to sensors, the first step is to establish the type of problem (sensor curvature, wire breakage, complete breakdown). If the malfunction is associated with a curvature of the structure, it will need to be straightened. Most often one of the load cells fails. In this case, you will need to follow these steps.
- Check the performance of the sensors. To do this, you need to put your hands on each of them. Even with a slight pressure on only 1 sensor, the balance should be switched on.
- Disassemble the scales, carefully examine the wiring.
- If there is a break (near the board or the sensor itself), it will need to be repaired. To do this, you will need to use a soldering iron.
- In some cases, the cliff is hidden behind the adhesive base. It is necessary to carefully open it and check the reliability of the connection.
Wires connected to the strain gauge
If the sensor is completely broken, replace it. It is quite problematic to find and buy a suitable spare part on your own. When looking for a new load cell, you need to pay attention to its compatibility with the device. It is better to buy it in specialized stores. When buying, you must use the help of consultants. The new sensor will need to be fixed in the seat, as well as soldered wires to it.
Repair of the loop is usually required when the numbers are not shown completely on the display. A ribbon cable is a set of wires that, inside the device, connect the display and the board. To assess the condition of this element and carry out repairs, perform the following steps:
- Complete disassembly of the case. Checking the integrity of the loop.
- If the numbers are displayed incompletely, it means that the loop is moving away.
- Elements that extend from the board are securely soldered.
Fuzzy display of numbers on the display (example in the picture) may be due to its breakdown or poor-quality wire connection
You can use a special conductive adhesive to press the ribbon and all pins against the board. After that, the problem should go away. All gluing or soldering work should be done with great care. There is a possibility of damage to the board due to careless actions.
In some cases, the malfunction is associated with incorrect sensor settings. Incorrect data on the display can be displayed if for some reason the calibration has not been performed. Modern scales are automatically calibrated every time they are in a new place.
Some balances allow manual calibration. To do this, you need to do the following:
- The power button is pressed and held until the inscription CAL appears.
- A load is placed on the device, the weight of which is precisely known.
- Calibration in progress.
- After successful actions, PASS appears.
At home, this is the only way to calibrate the scale. If this does not help, then you will need to contact the service center and order a calibration service. Experts have a tool to help you calibrate even the simplest products.
Sometimes the scale does not work due to accumulated dust and dirt. In this case, you just need to clean them. It should be noted that cleaning an electronic device is also the prevention of its breakdown. You will need to disassemble the device and use a special brush to get rid of dust on the board and load cells.
The internal structure of the scale - all these elements must be thoroughly cleaned
Cleaning should be done with great care. The main thing is not to rip off the wire or cable. Dust can seriously distort readings if it is found in large quantities near the sensors. For high-quality and safe cleaning, you can use a rag. This material will not harm the board and will not leave any unnecessary elements inside.
The scales have their own service life, after which they fail. Usually this period varies from 3 to 10 years (depends on the brand and model of the device).
Load cells break down first. They start sending the wrong data. The operating time is influenced by the operating conditions. If the scale is used on a daily basis (for example, for weighing in a gym), it will fail faster.
Standard weighing procedure. Sometimes leads to failure of the device
If there is no time for self-diagnostics and repairs, a visit to specialists is an excellent alternative. Many companies repair bathroom scales. They have the necessary tools and spare parts.
Before proceeding to diagnose or troubleshoot a problem, a person should carefully study useful articles and read the instructions for the floor scale. In no case should you continue to use the broken product. This can lead to complete failure of the device.
If a person's scales break, there are several ways to solve the problem. Sometimes repairs can be more expensive than buying a new device, especially when it comes to budget devices.
Read about what you should pay attention to when choosing commercial floor electronic scales in our article.
Repair of scales: electronic floor scales, self-calibration with your own hands, video, how to fix shopping
How to repair your balance: 5 troubleshooting steps
Displays in modern electronic scales are liquid crystal and, as a rule, are connected to the microcircuit either with the help of an internal loop, or with the help of a special conductive "rubber band". It so happens that it is not tightly adjacent to the board or display. In this case, the image on the display will be distorted or incomplete.
In case of problems with the image, you need to rinse the gum, clean the contacts of the microcircuit with alcohol, reinstall everything and check the reliability of the screws with which the board is attached.In case of unreliable fastening, or a thread break from the screw, it is necessary to better attach the board to the elastic band.
All scales operating on electronics, such as devices from Tefal or Grodno, have a weight limit, which should not be exceeded. If the permissible values are exceeded, as a rule, it is more than 150 kg, the device may deform, the power elements will lose their elasticity. As a result, the device may malfunction.
In addition, the following factors affect the correct operation of the device:
- If the permissible load is exceeded, the measurement sensor located on the power frame may break;
- The scales will not work in the event of failure of one or several parts of which the structure itself consists;
- Often, during operation, the wire leading to the microcircuit breaks.
If, having eliminated these minor misunderstandings, you see that the device still does not work, or shows an error (Err), then you need to take it to the specialists in the service center for more in-depth testing.
All electronic scales operate on the same principle, which means that their main faults are of a similar nature. The scales are designed in such a way that their sensor can go astray at any moment. Then you may notice that they are lying, or the digital electrical panel is just jumping. Why did they go astray, what can be done, and how to fix the situation?
For people who are at least a little familiar with the laws of physics, it will not be difficult to set up an electronic scale on their own. It is enough to carefully follow all troubleshooting procedures.
Self-repair of the scales is also good because in this way you do not need a workshop, and you can save money on calling the master. In addition, in the main, the malfunction turns out to be a trifle, and it will not be too difficult to complete it yourself. It is possible that the battery in your device is simply discharged. Or maybe you need to calibrate.
When it becomes necessary to calibrate the weights, the following should be done:
- Press the power button;
- Hold it until the word "CAL" appears on the board;
- Place an object on the scale, the mass of which you know for sure;
- When you see the digital value of the mass, adjust the indicator;
- After the message "PASS" appears on the screen, remove the inscription;
- Switch the balance off and on again.
Your instrument should now be working properly. If problems persist, look elsewhere for reasons.
Electronic scales work on a different principle than mechanical ones. However, whatever the complexity of the device, the scheme of operation for all electronic devices is the same. It is based on measuring the resistance of a strain gauge. In this regard, the repair of all electronic type scales is carried out according to a similar scheme.
Whatever your home bathroom scale is, the only difference is the electronic filling. All models that determine the biometric parameters of the human body are just a set of resistors with microcircuits. These devices are no different from the primitive Chinese pink flooring devices for teenage girls.
It is not recommended to undertake repairs of electronic floor scales that are under warranty. Especially if these are expensive and branded products. It is better to take them to a service center, where specialists will conduct high-quality testing, repairs and preventive measures. Those who decide on homemade repairs of electronic floor scales, before disassembling the device, should know their device.
Electronic floor scales usually consist of the following fundamental elements:
- Load cell;
- Electronic printed circuit board;
- Display;
- Buttons.
Of all this, you will not be able to repair only the display yourself. If it has turned black or all sorts of terrible patterns have appeared on it, then the crystals are destroyed, and it is no longer possible to save it.
If you are convinced that the reason for the breakdown of your scales is not in the batteries, but somewhere much deeper, and are set to repair the device yourself, then first disassemble the device by removing 2 3-volt batteries, and unscrew the bolts on the bottom cover of the case. Then, conduct a visual analysis of the apparatus. Inside the device you will find 4 legs, a battery compartment, a printed circuit board, wires and a screen with buttons. The front and rear legs have a slight difference in the form of a rubber ring and additional contacts with wires.
At the moment of the first pressing on the scales, the rubber ring of the serviceable devices is flattened, the contact is closed, and the scales are turned on. After that, the system waits for another button to close, which means the person's second leg on the scale.
Carefully inspect all parts and assess the quality of the electrical connections, the integrity of the electronic board and the serviceability of all parts. If a malfunction is found, determine the nature of the malfunction and proceed with the repair.
Step-by-step instructions for repairing electronic scales:
- All torn wires must be soldered in place;
- If the cable that connects the board and the display does not fit tightly, then slightly lift the microcircuit and, more tightly, press it to the display.
- Using a small piece of wood, install the retainer on the bottom of the scale body;
- Clean the inside of the device from dust and debris;
- Align the inner frames if necessary;
- If the paths of the microcircuit are damaged, then it is necessary to clean the place of the defect with sandpaper, treat the place of damage with a degreasing agent and plunge it. Solder the jumper on top, after which the damaged area should be varnished;
- In old scales, the ends of the contacts may have worn out, check them and replace if necessary;
If all of the above procedures did not help, then the malfunction is hidden deeper.


