In detail: charging for a lenovo smartphone 1a DIY repair from a real master for the site my.housecope.com.
Greetings radio amateurs.
Going through old boards I came across a couple of switching power supplies from mobile phones and wanted to restore them and at the same time tell you about their most frequent breakdowns and elimination of shortcomings. The photo shows two universal schemes of such charges, which are most often found:
In my case, the board was similar to the first circuit, but without an LED at the output, which only plays the role of an indicator of the presence of voltage at the output of the block. First of all, you need to deal with the breakdown, below in the photo I outline the details which most often fail:
And we will check all the necessary details using a conventional DT9208A multimeter.
It has everything you need for this. Continuity mode for diodes and transistor transitions, as well as an ohmmeter and capacitor capacitance meter up to 200μF. This set of functions is more than enough.
When checking radio components, you need to know the base of all parts of transistors and diodes, especially:
Now we are completely ready to check and repair the switching power supply unit. Let's start checking the unit to identify visible damage, in my case there were two burnt resistors with cracks on the case. I did not reveal any more obvious shortcomings; in other power supplies I met swollen capacitors, which also need to be paid attention to in the first place. Some details can be checked without soldering, but if in doubt, it is better to unsolder and check separately from the circuit. Solder carefully so as not to damage the tracks. It is convenient to use a third hand during the soldering process:
| Video (click to play). |
After checking and replacing all faulty parts, do the first turn on through a light bulb, I made a special stand for this:
We turn on the charger through the light bulb, if everything works, then we twist it into the case and rejoice at the work done, if we are not looking for other disadvantages, also after soldering, do not forget to wash off the flux, for example, with alcohol. If all else fails and nerves are in the balance, discard the board or solder and select live parts in stock. Everyone is in a good mood. I also suggest watching the video.

Lenovo charging repair - we will analyze the step-by-step method of repairing a charger or power supply for a laptop. To start direct repair of the power supply unit, you need to open it, which is not so easy to do as it seems at first glance. Nevertheless, you will have to open the block case with an object that can be used to disconnect the box. Most likely, a sharp screwdriver or knife will do.
After the case is divided into two parts, you need to dismantle the cooling radiator from it. But to facilitate the work, you must first unsolder the wire.
Then, at the output, we ring the wire with a multimeter in order to determine a short circuit and immediately ring the diode.
In the case of a broken diode, it is necessary to remove the heat sink on which the diode is fixed. You need to be careful here, as one side of the heatsink is soldered into the board. Well, then everything is clear - we change the diode to a known good one and put the radiator in place.
Do not forget, after replacing any part and soldering it into the board, cut off the excess length of its legs. It is good to clean the board with alcohol from the flux residues. To ensure the best contact between the diode pad and the radiator, heat-conducting paste KPT-8 should be applied to the attachment point.
At the next stage, we install the heat sink in place. At the same time, take measures to exclude a short circuit on the wire. If the wire is very twisted, then it is quite possible that a short circuit may occur in this place.Therefore, you need to cut off the plug on the wire with pliers and remove the insulation from it with the remnants of the wire.
The next step is to remove some of the insulation from the end of the wire, strip it thoroughly, and then solder the same place to the plug. Pay attention to the polarity when soldering - do not mix it up (see picture). Ensure no short circuit and fit heat shrink tubing over this connector.
Next, we solder the restored wire to the printed circuit board, also observing the polarity. The "GND" marking on the contact pad of the printed circuit board is used to connect the negative wire.
The assembly of the power supply unit must be carried out in stages in the reverse order. After installing all the parts in the housing, you do not need to glue it immediately. You must first check it for performance, and then glue it together.
Now, as never before, the number of gadgets per person has reached the maximum value.
Phones, tablets, laptops, various wireless headsets - all this abundance of technology has a power source and, accordingly, a charger for it.
Chargers are often carried with them in a bag or pocket, and so that they take up a minimum of space, their cords are twisted with a bend and a stretch.
This, in turn, leads to an almost imperceptible wire break and inoperability of charging. Just break in the cord - this is the most common breakdown in such types of devices, and, frankly, it is a pity to throw it away because of this.
Yes, you can certainly buy a new one and not suffer, but if the device is non-standard, for example, an old model phone, then it is not always possible to find such a charger. And at the "flea market" you can slip a block with the same problem, and no one needs extra spending.
Therefore, repairing a charger is a useful and worthwhile business.
Below, in this article, a simple repair method that does not require special equipment will be described, which will give your charge a second life.
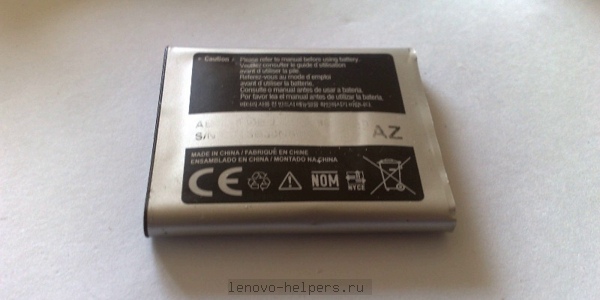
In the photo - charging with a problem in the cord.
The cliff is not always visible to the naked eye. It can be hidden under the thickness of the main (top) insulation and remains practically invisible.
But, as practice shows, the fracture occurs most often near the entrance to the block or at the base of the plug.
To locate the break, just connect the included charger to the phone and wiggle the cord in a suspicious place.
As soon as you see that the charging "went" for a moment, it means that there is a break in the place where you were moving at that moment.
In this case, looking closely, the break and cliff were visible even without stirring. It just turned out at the entrance to the power supply.
The main problem in the repair of such blocks is that it is not collapsible. Therefore, to get to the electronic board, you need to be careful and some effort.
Using a screwdriver and a knife, pry off the base of the rear cover and remove it.
Pry should be at the point where the cord enters the device. If the entry is too tight, you can cut the rubber strap slightly.
This must be done carefully so as not to cut the wire at all.
Having poked it up with a screwdriver, we try to lift the cover up.
It may happen that it cracks in half, but more often, as in this case, the cover was removed entirely, without damage.
It was even seen that it had latches, and in the charger case there were recesses for them.
This means that it is possible, after repair, to put the cover in its place without using glue.
When the cover is removed, you need to pull the printed circuit board out of the case. Since it "sits" tightly, a screwdriver will help to get it out. Leaning the blade of the screwdriver against the body and hooking it with the end of one of the soldering points, we pull the board out.
The structure of the case is such that when the board is inserted inside, its input contacts are connected to the clamps of the pins of the power plug. Therefore, when installing the board back into the case, you need to take this point into account.
The photo below shows the board with all its "insides". The wires are soldered at the bottom.
View from the opposite side.
And here in the photo are the tracks for the input contacts.
The wire will have to be cut below where the damage is. But it is very important to remember which wire is "+" and which is "-". In some cases, the wires are colored accordingly, red is the positive and black is the negative.
With color marking, you can safely cut, and then just solder the wires, observing the polarity.
In our case, the wires are of the same color, but since the cord is flat, you can trace from which side of the cord the wire goes to minus, and from which to plus. Mark and then crop.
Next, unsolder the remaining ends from the board and prepare holes for soldering a new wire.
Without losing the label, strip and tin the wires on the cord.
Solder them one by one to the board, observing the polarity.
The PCB usually has polarity markings at the soldering point.
To prevent the cord from dangling at the outlet, we wind a bandage of black electrical tape around its entrance part. The thickness of the band should be such that it fits into the slot for the wire and locks into it.
Before installing the cover, we check the operation of the device. We plug it into the network and connect it to the phone. If the phone is not with you at the moment, we use a DC voltmeter.
Since the internal contact in the socket has a very thin tube, and the probe of the device does not go into it, you can use a piece of thin copper wire to check.
Having inserted it into the tube of the internal contact, we connect the probes of the measuring device to it and to the external output of the plug.
The voltmeter shows that voltage is present, which means that the breakdown has been repaired.
Now we snap on the back cover.
We connect the phone and rejoice at the results of the work done.
Nowadays, it is hard to believe that mobile devices were the easiest way to connect with other people. Now an ordinary mobile phone has turned into a high-speed smartphone with huge multimedia functionality, and the body has begun to store the power of a good computer inside itself. The use of devices is very addictive and some do not even take a break, even for a short time. Such exploitation greatly affects charging, and constant recharging can lead to damage to one of the most important connectors of the phone. How to fix the phone charging jack if it breaks down, you will learn from today's article.
How do I fix the charging port on my phone at home? Here you need to figure it out, then everything will work out. Inaccurate use of a mobile device very often ends in some kind of breakdown that needs to be fixed. Sometimes the breakdown lies in the power cable connector. In this case, you need to find out how to fix it, and for this it is worth familiarizing yourself with the main causes of the defect.
- You can spill some liquid on the device or just drop it well to disable this module.
- Constant mechanical stress deforms the socket, which can make charging the gadget simply an impossible procedure - the plug will not fit into the socket or it will dangle in it.
- Contact pads may also bend, which will completely block access to electricity.
Let's talk right away about the worst thing - about moisture.
Moisture contact of a mobile phone connector is the most dangerous damage. Corrosion will start a chain reaction and all nearby components will oxidize. Such defects can also damage the dynamics, which is most often located at the bottom of the device. Also, the speaker itself gives access to moisture to get on the cable or connector. Therefore, even light rain can damage your phone.
Important! Find out what you can do, is it possible to reanimate the gadget if a more serious trouble happened to you - the phone fell into the water and does not turn on.
The most important thing is to assess the complexity of the damage, since not all cases allow you to repair a house. The best option is to use the services of a qualified specialist from some service center.So you will not risk breaking your device.
Very rarely, restoration work can be carried out independently. It is best to find an alternative way of charging for a while, until you decide for yourself whether to fix it yourself. While the required amount is being set aside for repairs in the workshop, read the instructions for charging a phone with a broken socket:
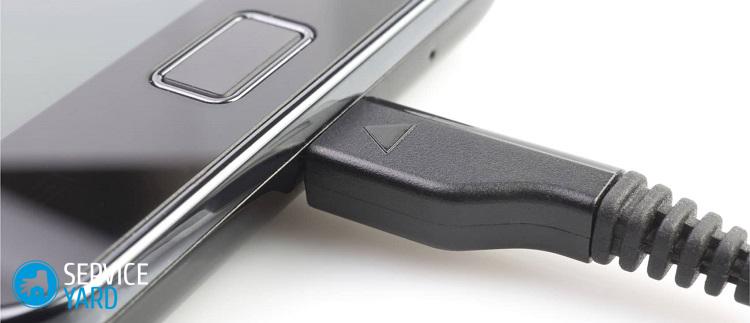
- Insert the charger into your smartphone and plug into the network.
Important! This method is relevant only for devices that have suffered from mechanical stress, and not from moisture.
- Gently wiggle the cord and device in opposite directions. You may be able to close the contact and charge the device.
- If the mobile phone still detects the presence of a charger, then it is worth fixing the position found. Books and other items can be used that can set the phone so that the power continues.
- Before carrying out all these actions, it is worth making sure that the problem is in the socket, and not in the battery. Prolonged use of the phone leads to the fact that it no longer holds a charge. For this case, you will have to acquire a new battery, and not deal with a "phantom" breakdown.
- If it's all the same in the nest, then repairs here cannot be avoided.
Important! Remember that all these manipulations can further loosen the nest, so do not use too much force during work.
If everything is in order with the connector now, but the problem of the lack of energy in the battery still has not disappeared, read on what to do if the phone does not charge from charging.
If your phone is designed to allow you to remove the battery, then you can use the universal charger. Such devices are called "Frog". It costs, of course, not very cheap, but sometimes you need to urgently charge the phone. This gadget has special grooves into which you need to insert and fix the battery.
But this method also has a number of obvious disadvantages:
- While charging, the smartphone will not work and cannot be used until the battery is charged.
- The purchase price of "Frog" is quite high and does not always justify its purchase.
- If the reputation of the manufacturer is very dubious, then you will only harm your device.
back to content ↑
How do I fix my phone's charging connector? You can try to replenish energy reserves by disconnecting the power port itself from the phone.
Important! This method is very complex and requires the user to have basic knowledge and skills in working with equipment and electricity.
The essence of the work is as follows:
- We remove the battery from the smartphone.
- We unplug the charger from the outlet, arm ourselves with a sharp object and remove the insulation from the wire by five centimeters.
- Strip the wires and determine where the plus is and where the minus is.
- Determine the polarities on the battery and connect the wires to it.
- Secure the improvised terminals and apply mains power.
Important! This method is not recommended as you may get hurt even while charging. Do not work with uninsulated wires if you have never done so and do not know how the electric current behaves.
You need to be very careful if you do decide to fix the charging jack with your own hands.
To disassemble the case and remove the socket, we need:
- A small set of screwdrivers.
- Technical tweezers (regular tweezers will work as well).
- A utility knife or a regular sharp one.
- Soldering Station.
Now you need to do the following:
- We unscrew all the screws on which the case is attached.
- Carefully remove the cover by prying it off with a clerical knife.
- We ground the soldering iron, solder the wire to minus (device body). The other end of this wire must be brought to the body of the soldering iron itself.
Important! These measures are necessary so that the mobile phone does not suffer from the accumulation of static electricity, which can harm parts. It's also a good idea to make an ESD wrist strap and ground it.
- Now we unsolder all the wires from the socket.This is to prevent short circuits.
- Next, you need to remove the screws from the board that hold it. Now we have access to the microUSB connector.
- We take out the old socket, solder a new one in its place, assemble the device in the reverse order and check it for operability.
You may also find our instructions on how to clean the headphone jack on your phone useful.